Link to Notes from Anywhere on macOS
NoteCove’s Apple Shortcuts integration lets you build powerful automations. This tutorial shows one practical example: creating a pair of shortcuts that let you generate a link to any note by title and open it from anywhere on your Mac — Calendar, Mail, a browser bookmark, wherever.
What you will build
- Make NoteCove Link — a shortcut exposed in the macOS Services Menu that asks for a note title and copies a link to your clipboard
- Find Note — a shortcut that receives that link and opens the matching note in NoteCove
Before you start
- NoteCove Desktop installed and running (macOS 14+)
- The macOS Shortcuts app (included with macOS)
Part 1: Create the “Make NoteCove Link” shortcut
Step 1: Open the Shortcuts app and create a new shortcut
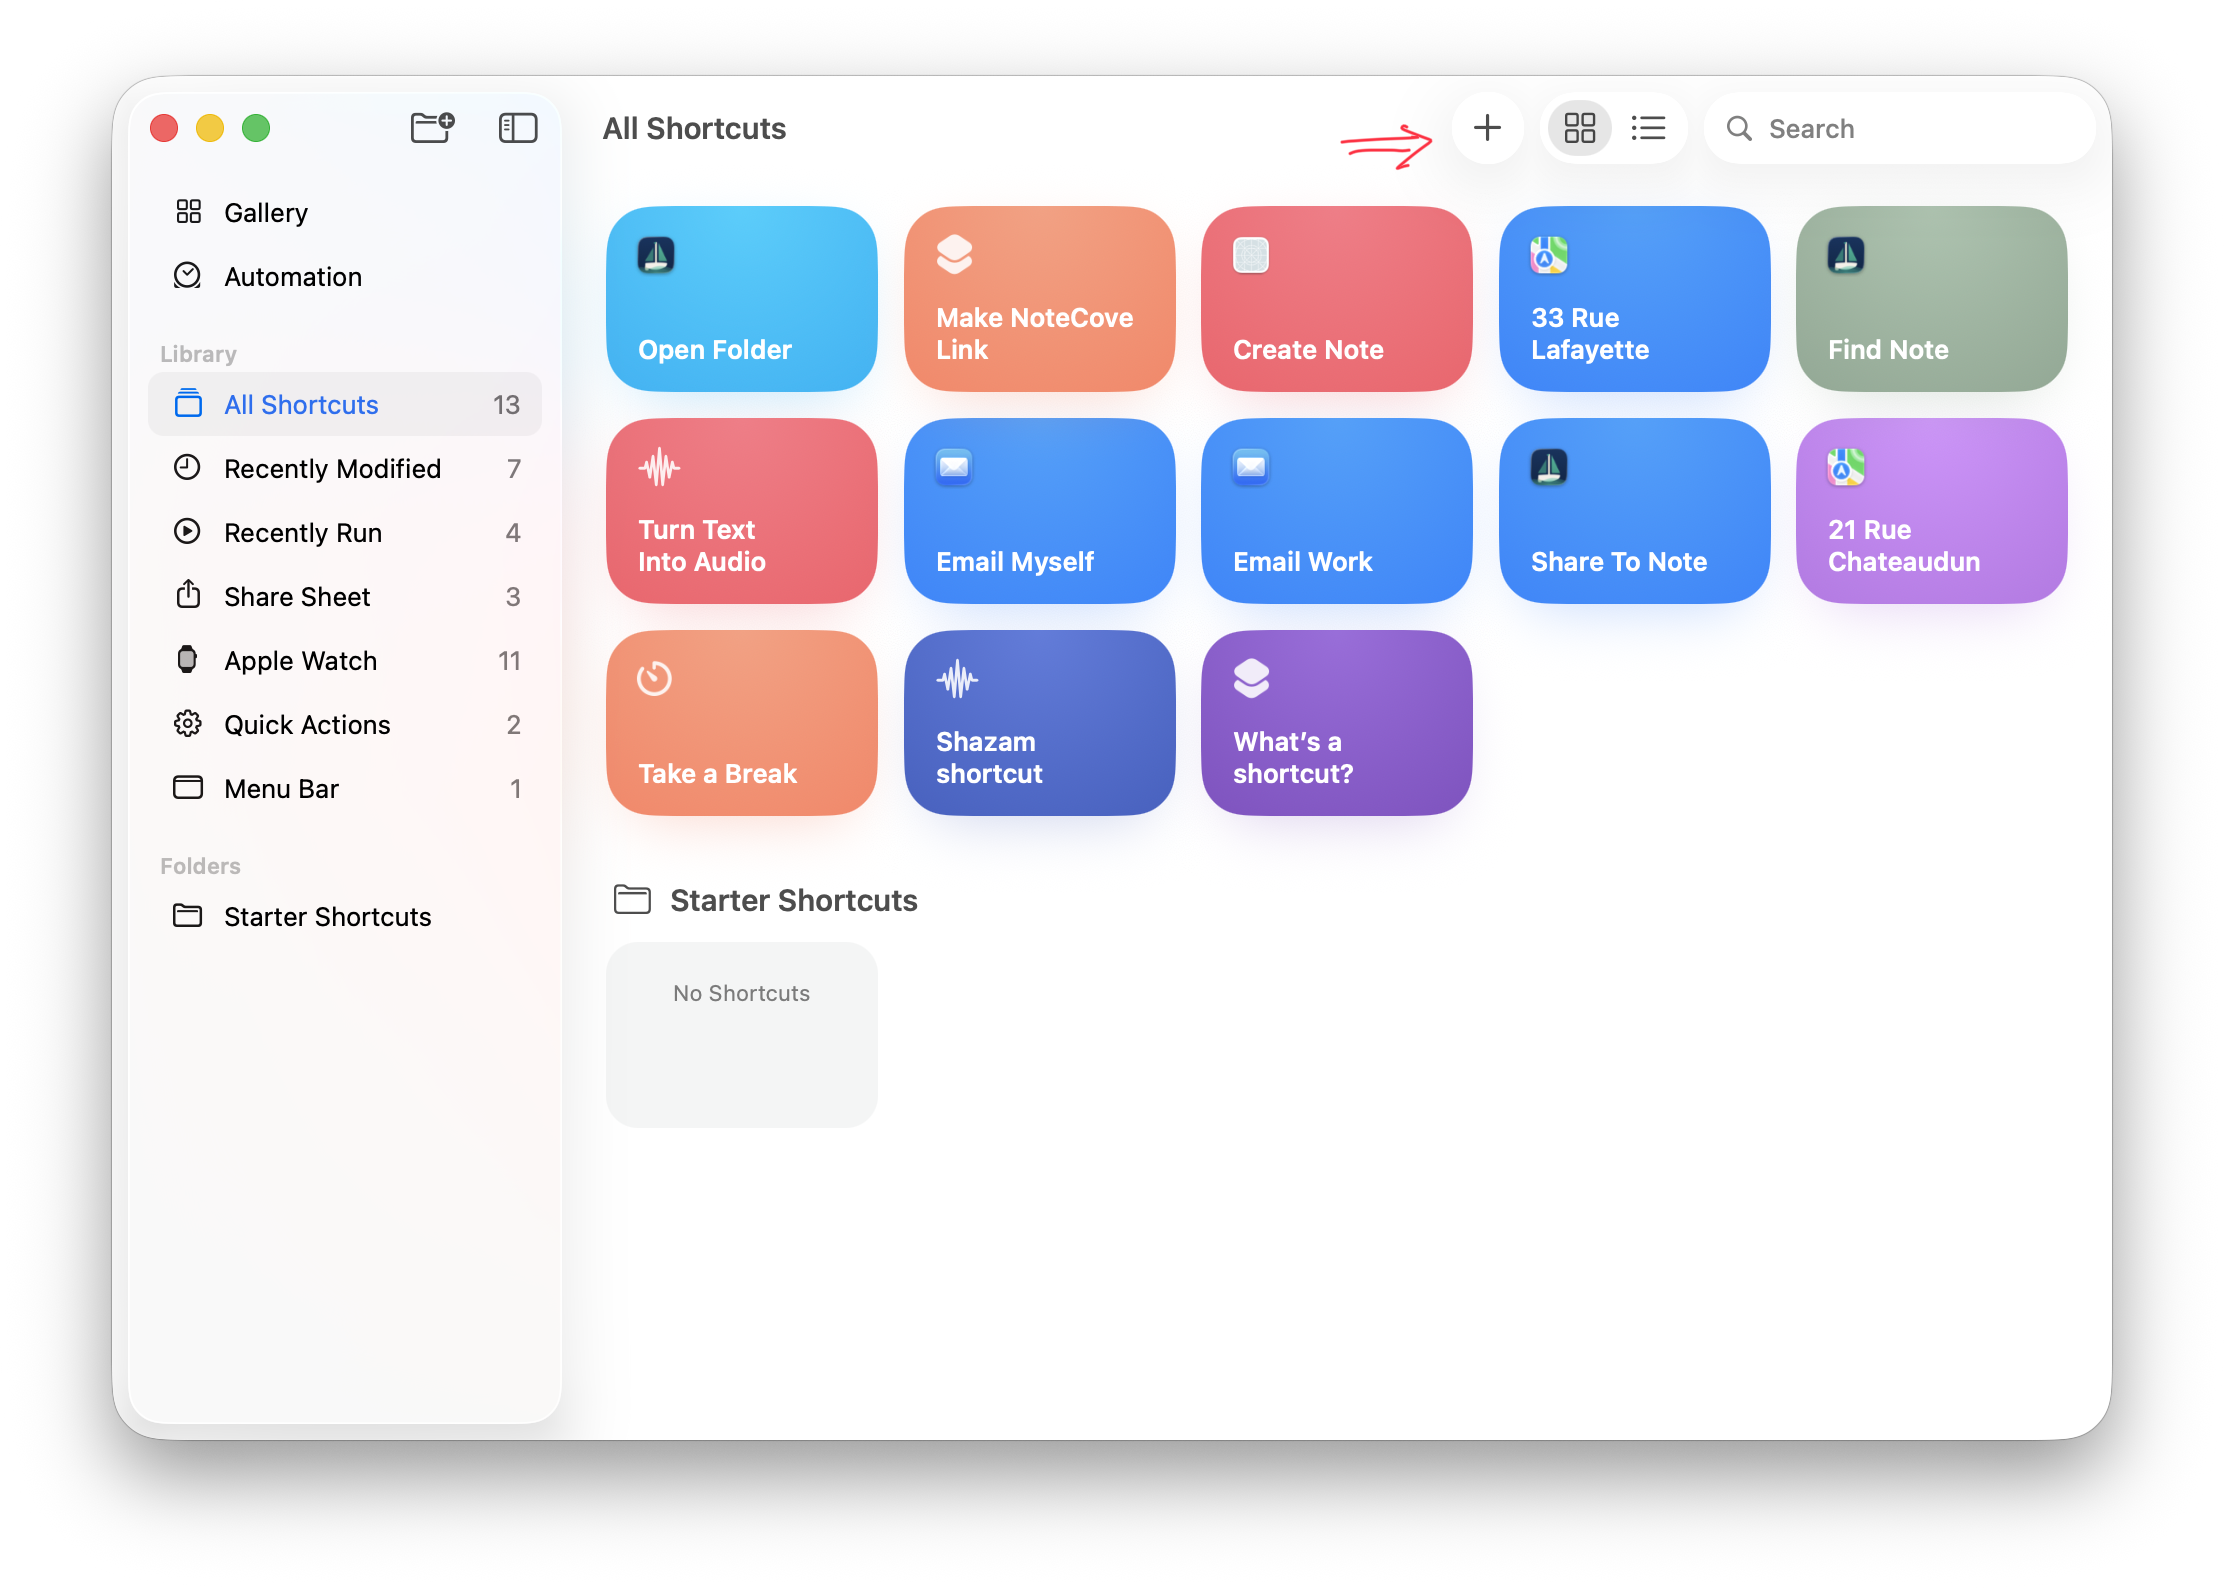
Open the Shortcuts app and click + to create a new shortcut.
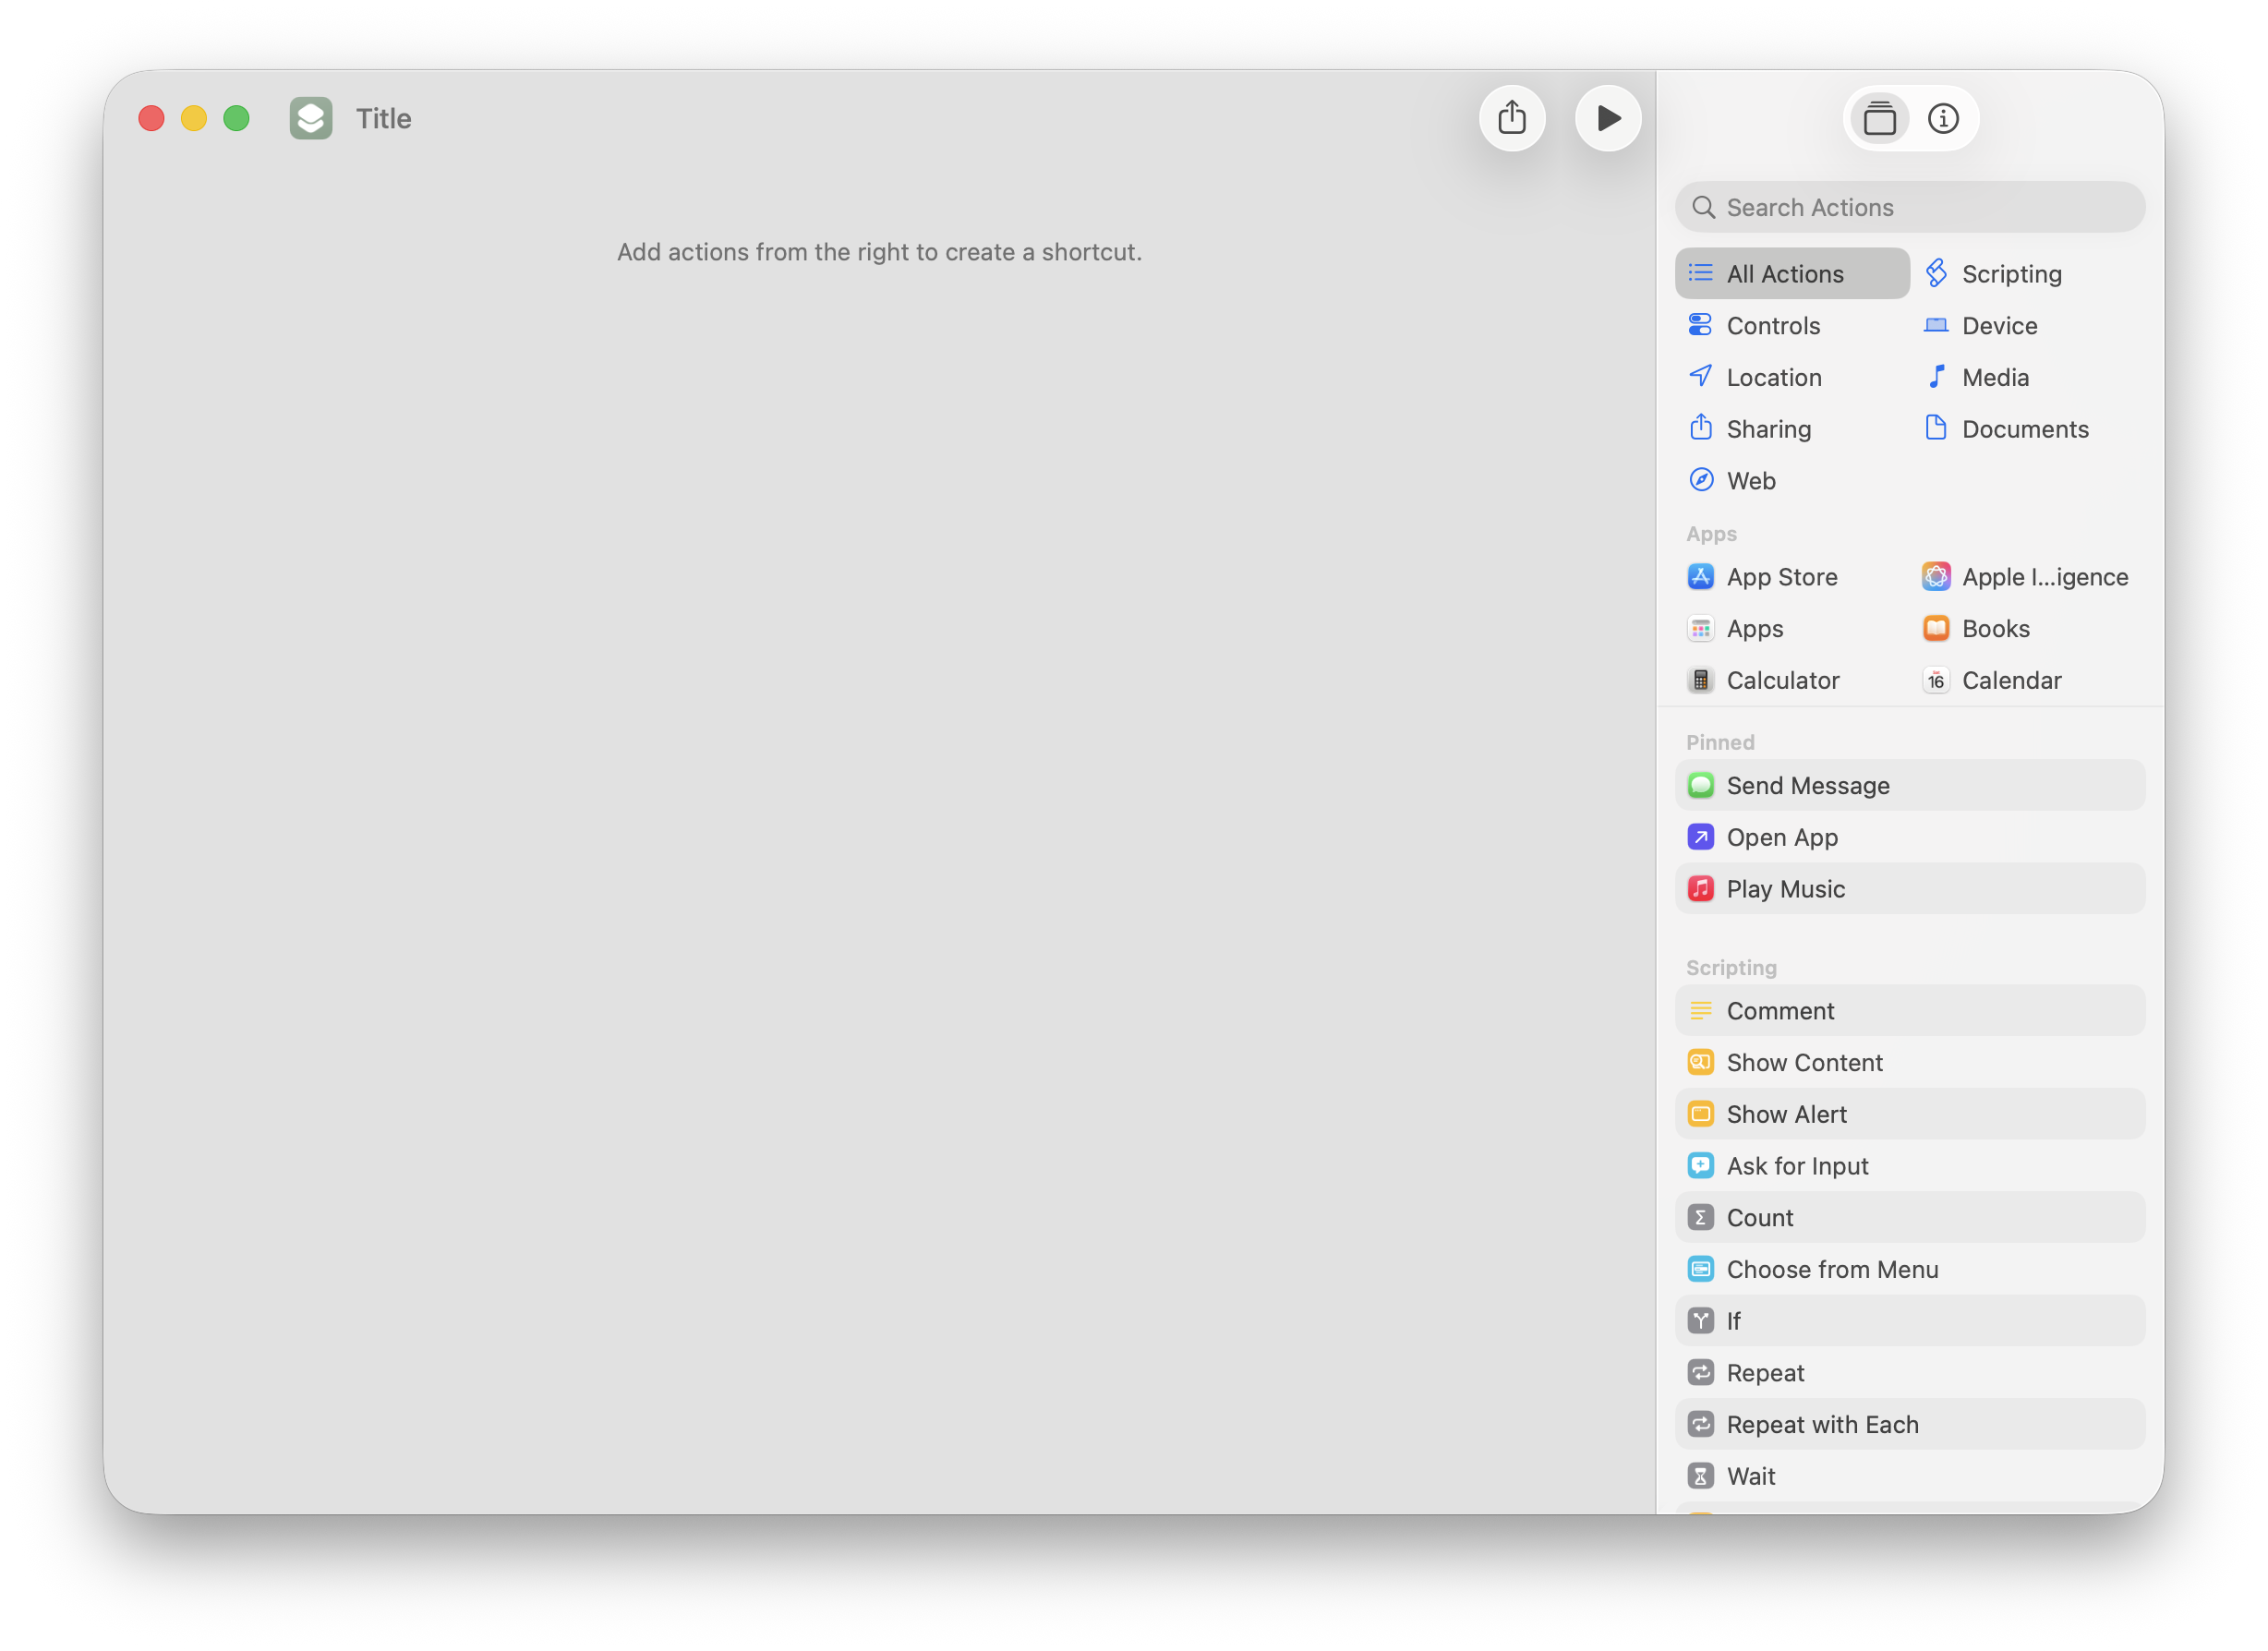
A new editor window opens.
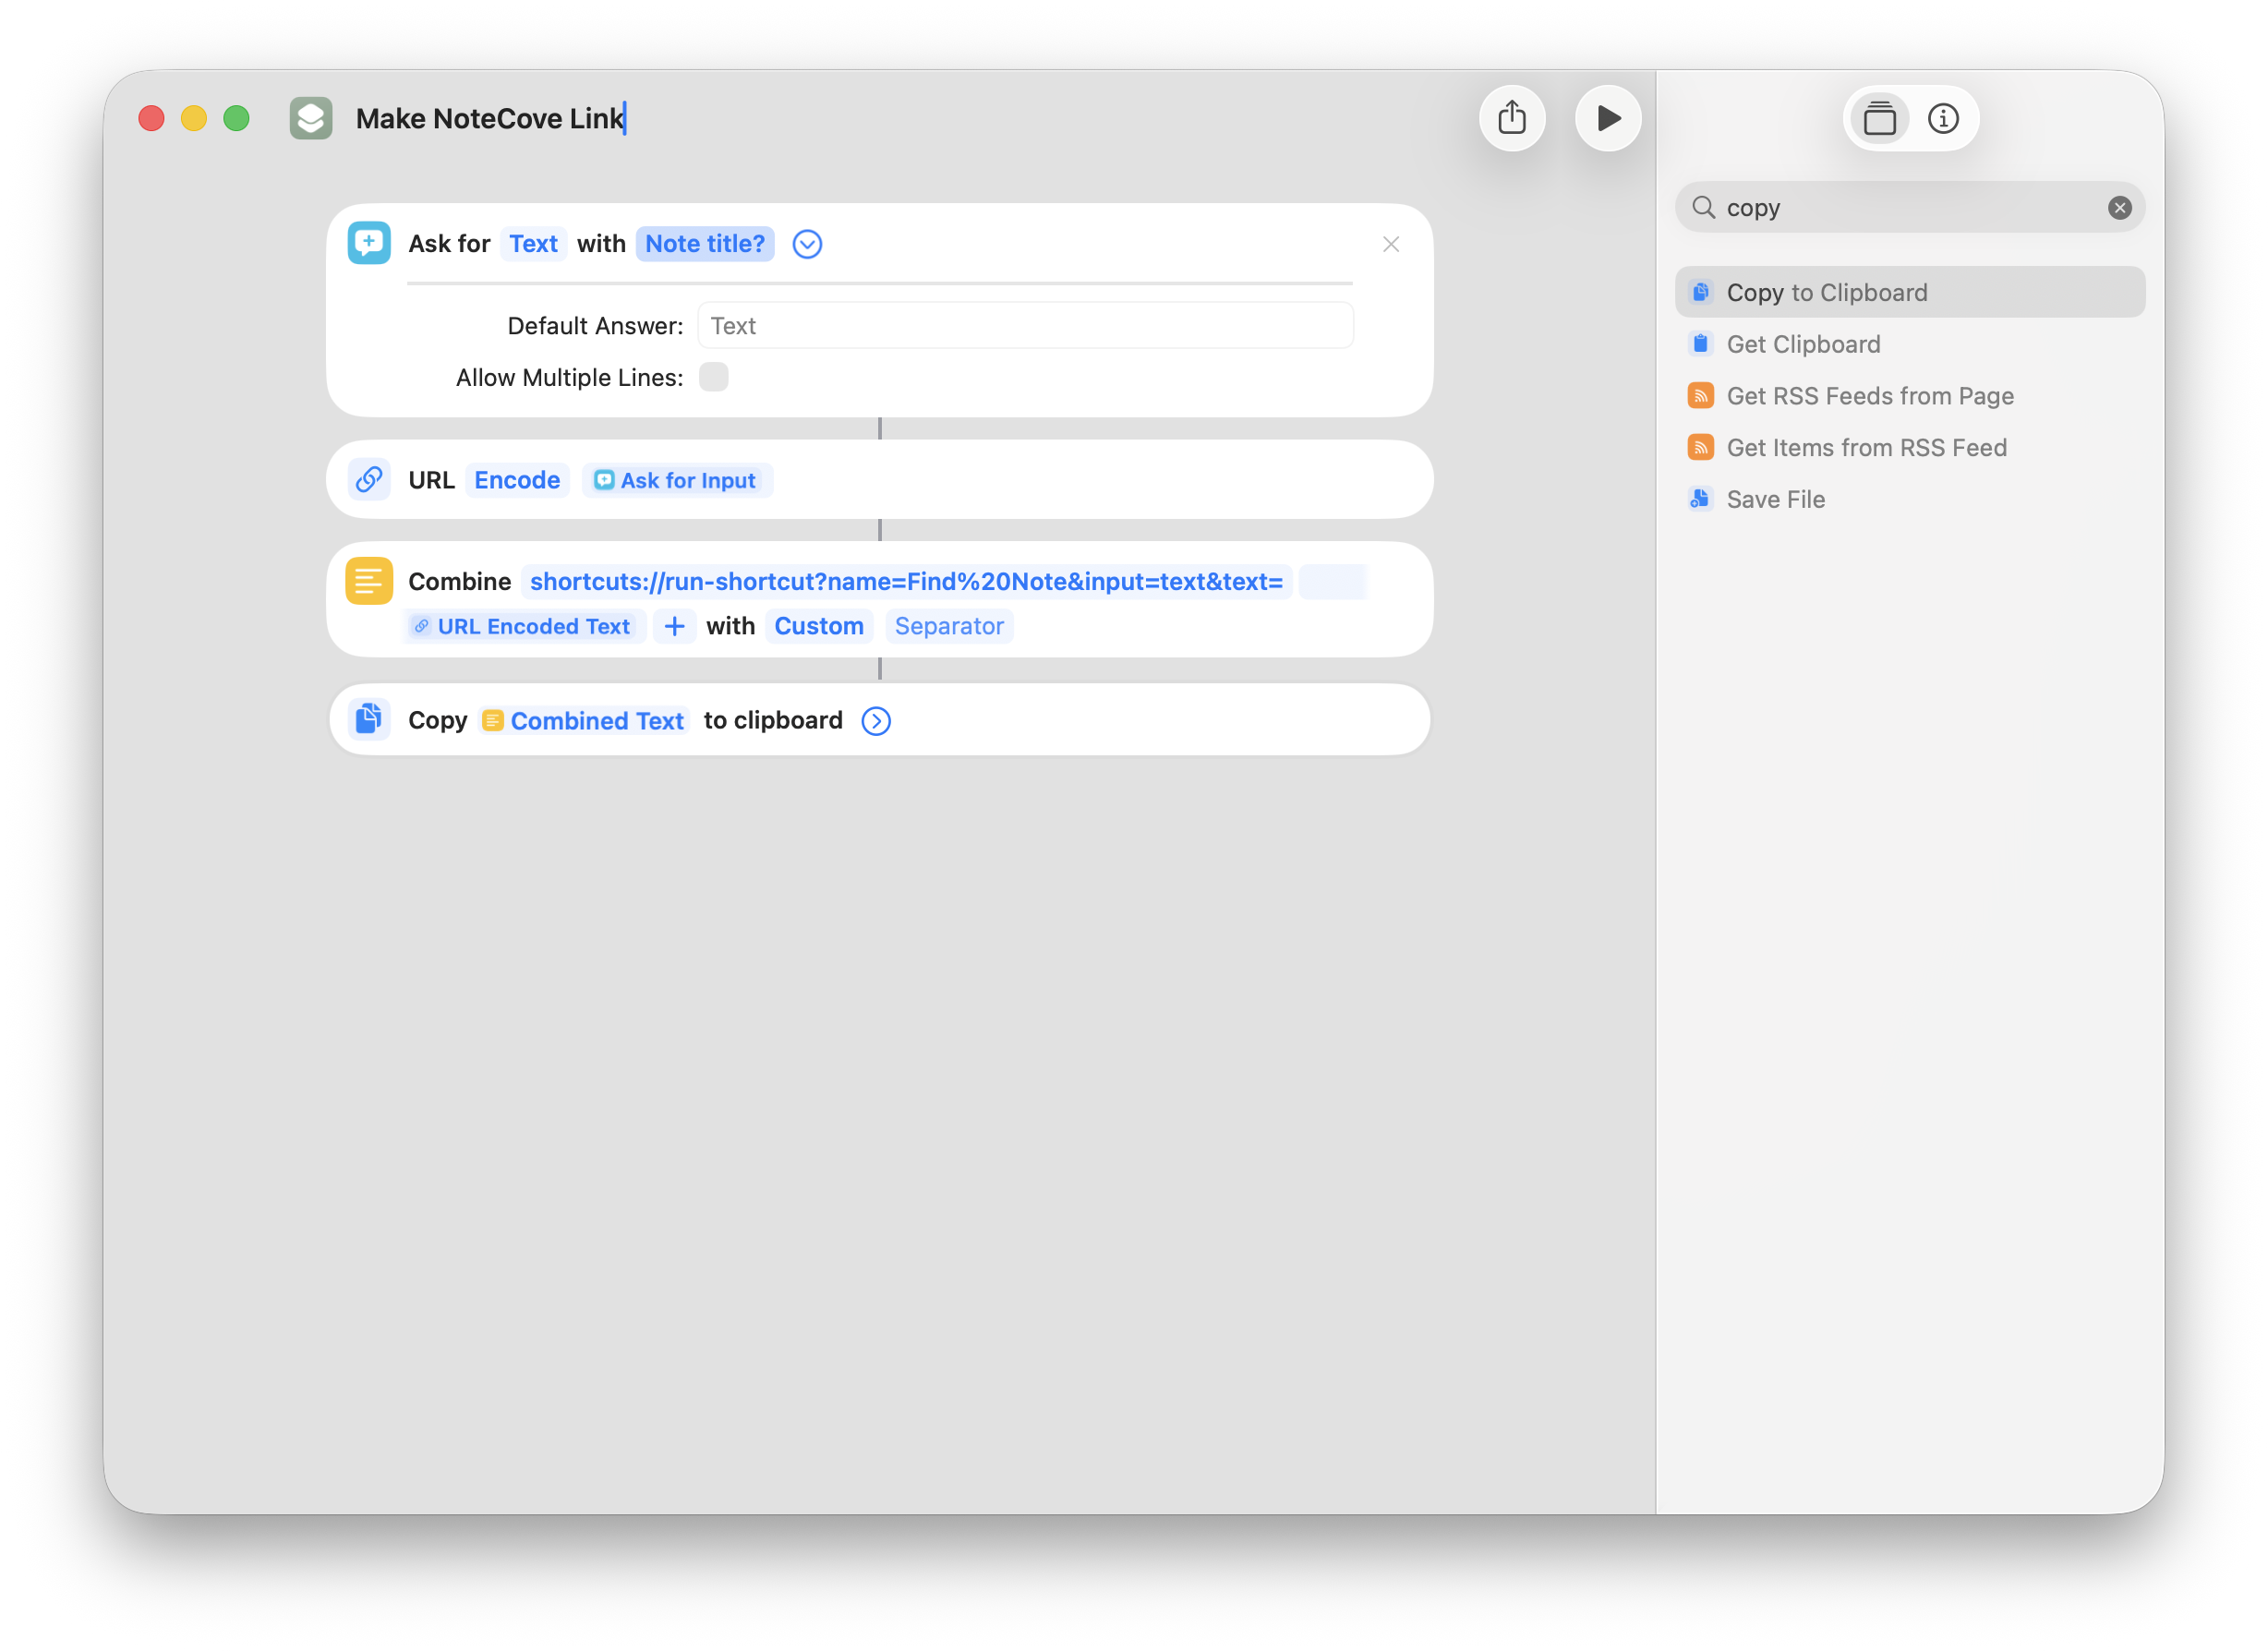
Step 2: Add an “Ask For Input” action
Search for and add an Ask For action. This will prompt the user for the note title.
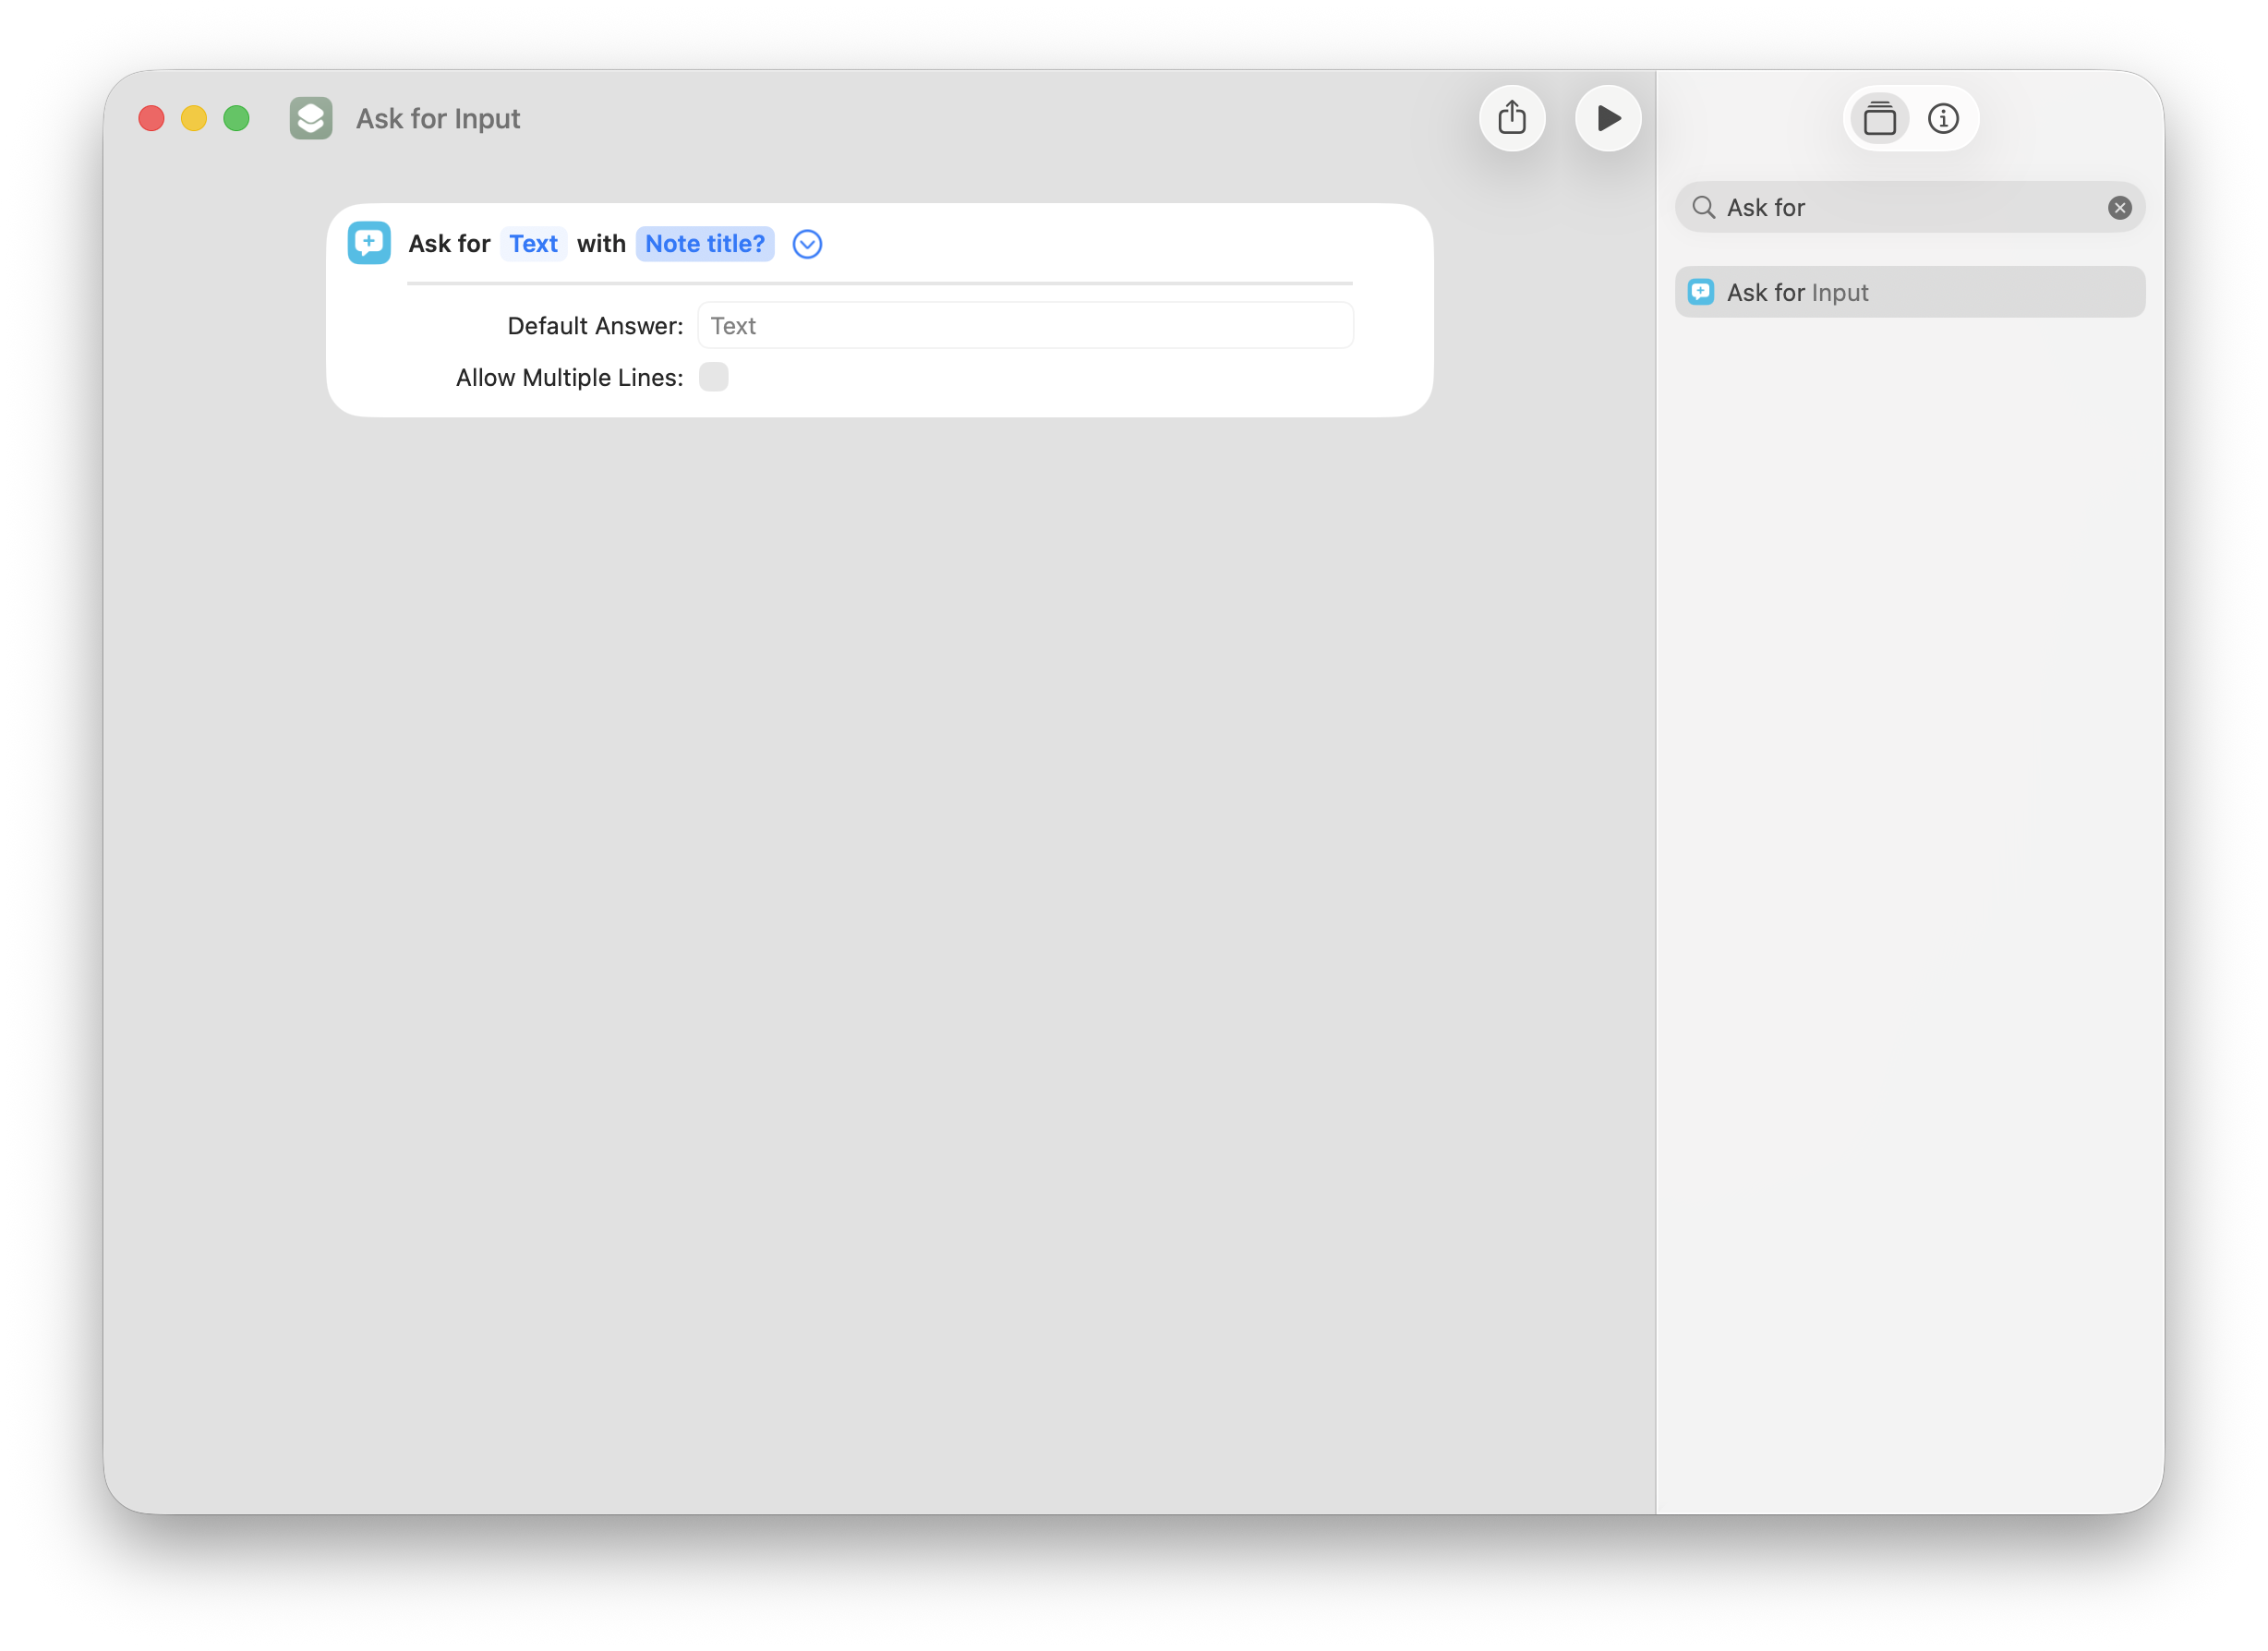
Click the Prompt field and type Note title?. Then click the arrow to the right of the prompt and uncheck Allow Multiple Lines so it stays a single-line input.
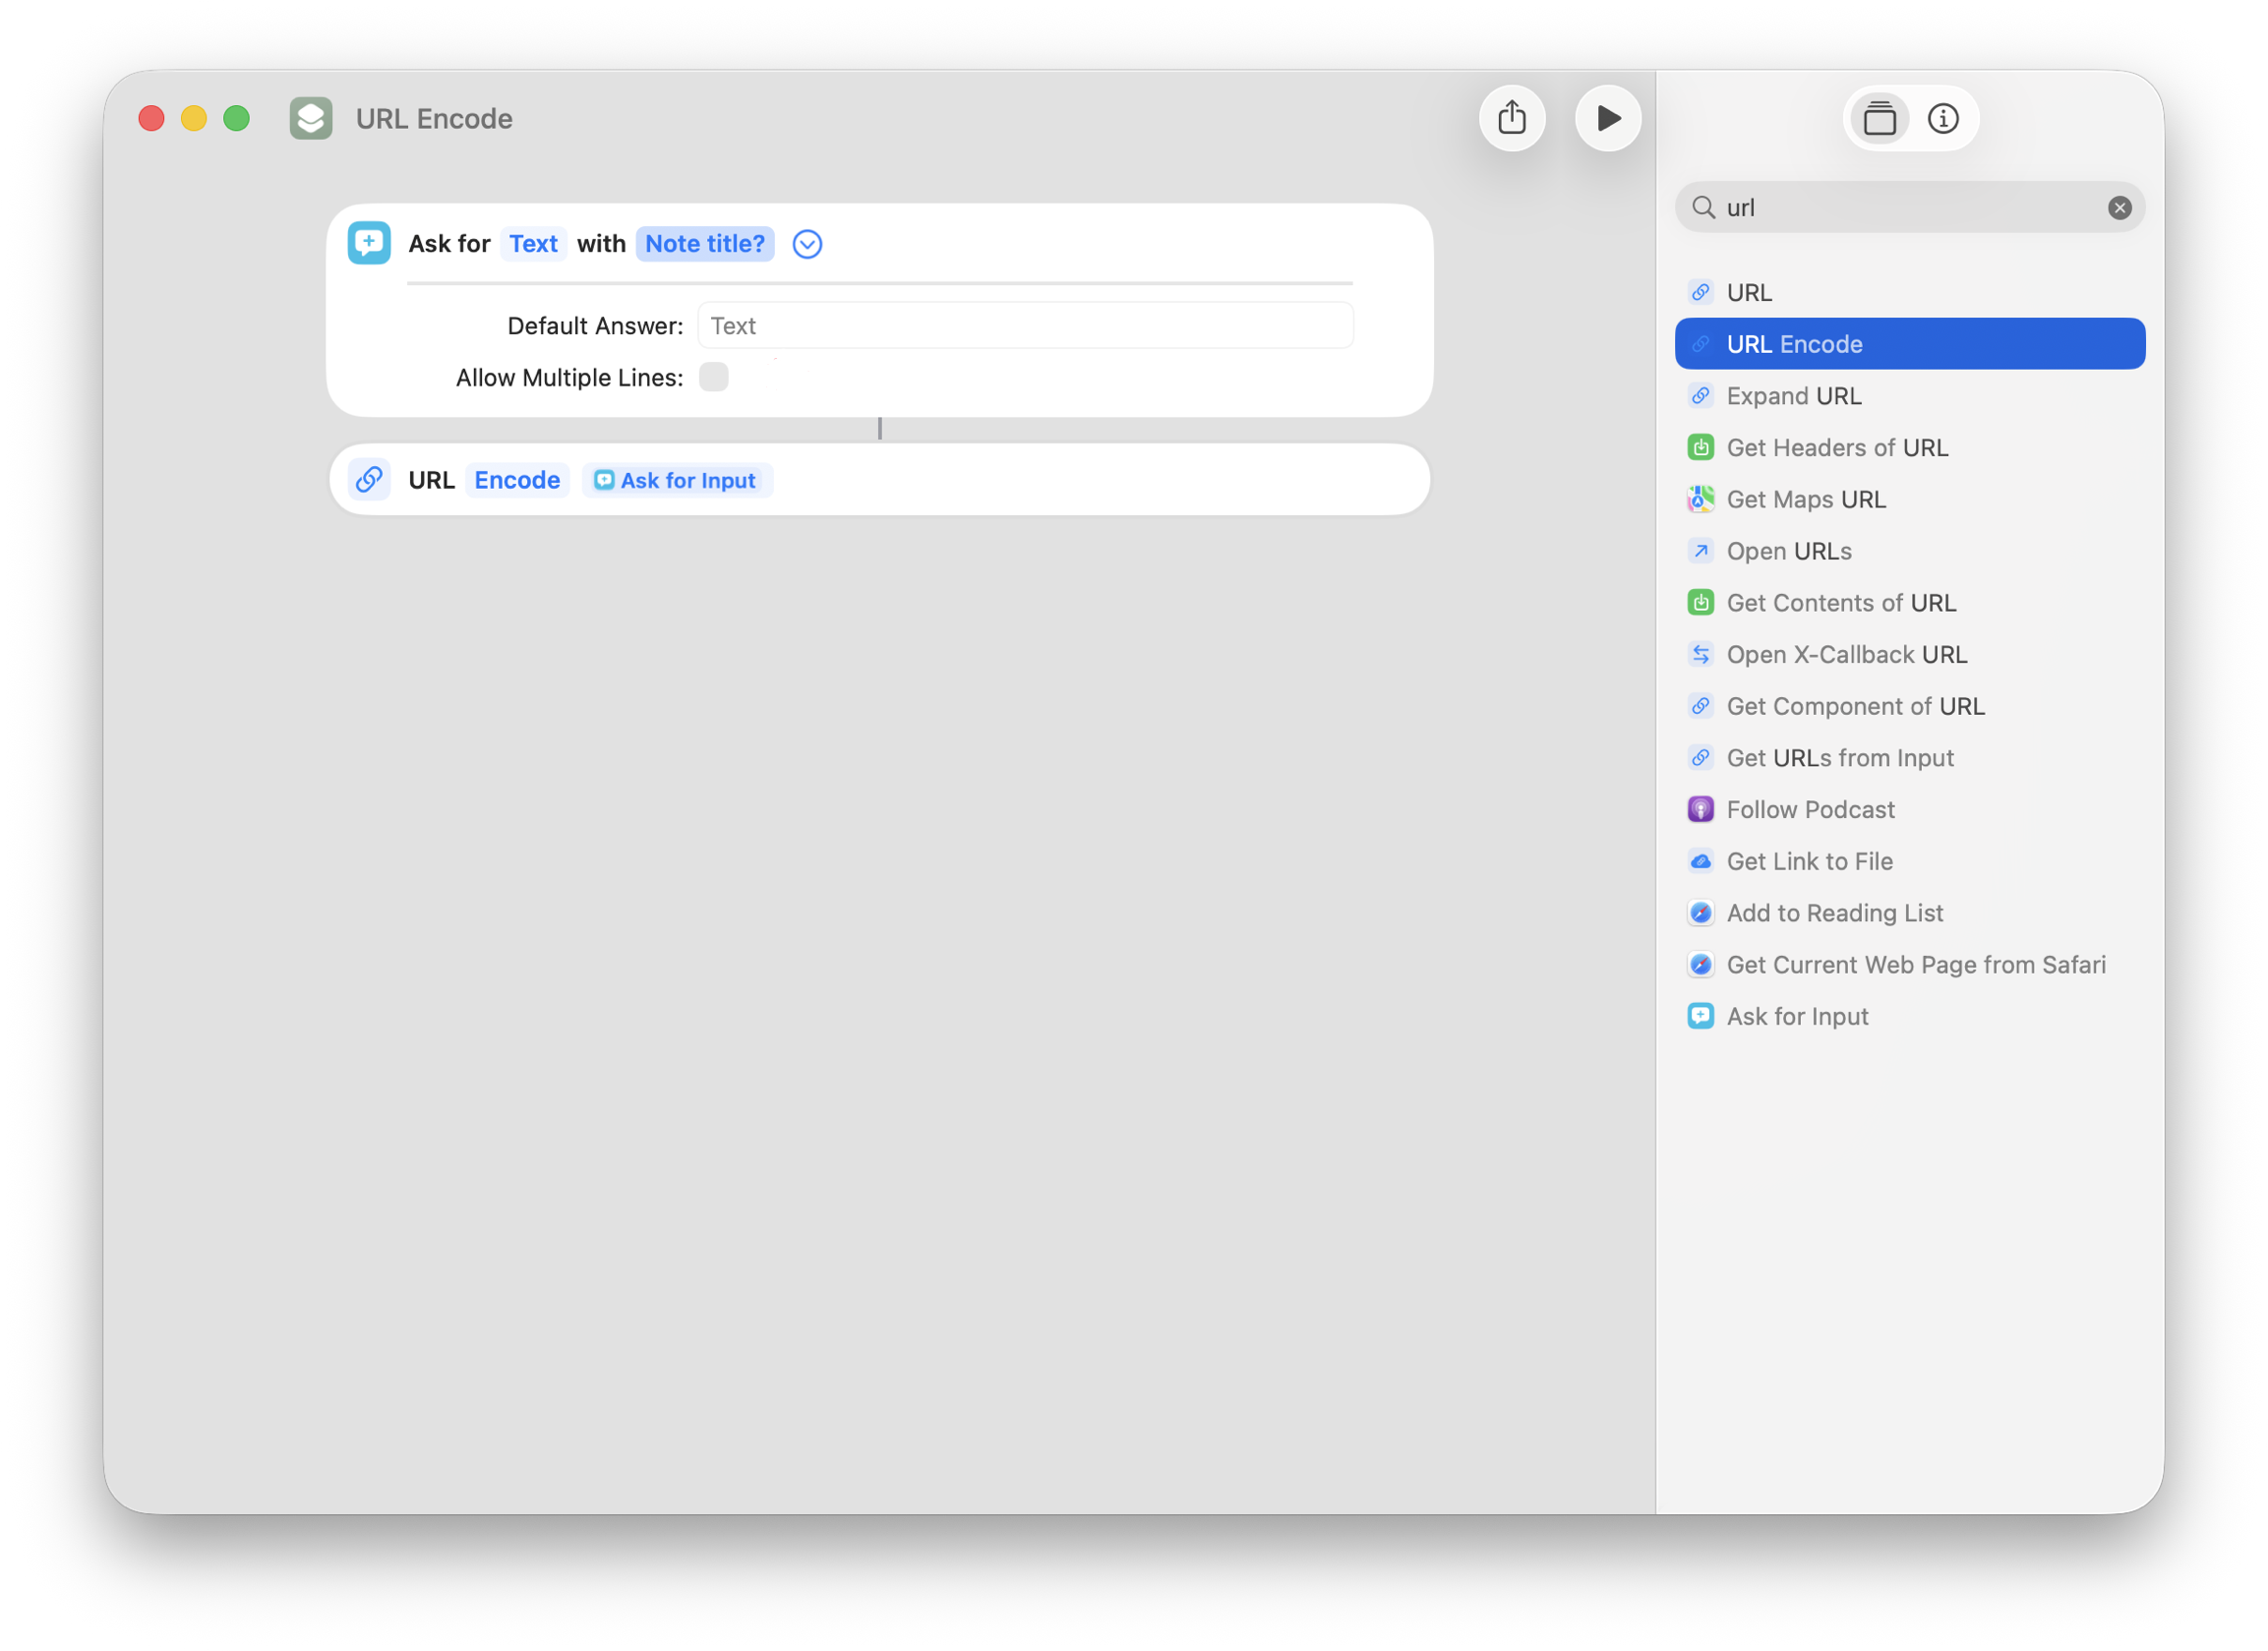
Step 3: Add a URL Encode action
Add a URL Encode action after the Ask For step. This encodes the title so it can be safely embedded in a URL.
Step 4: Add a Combine Text action
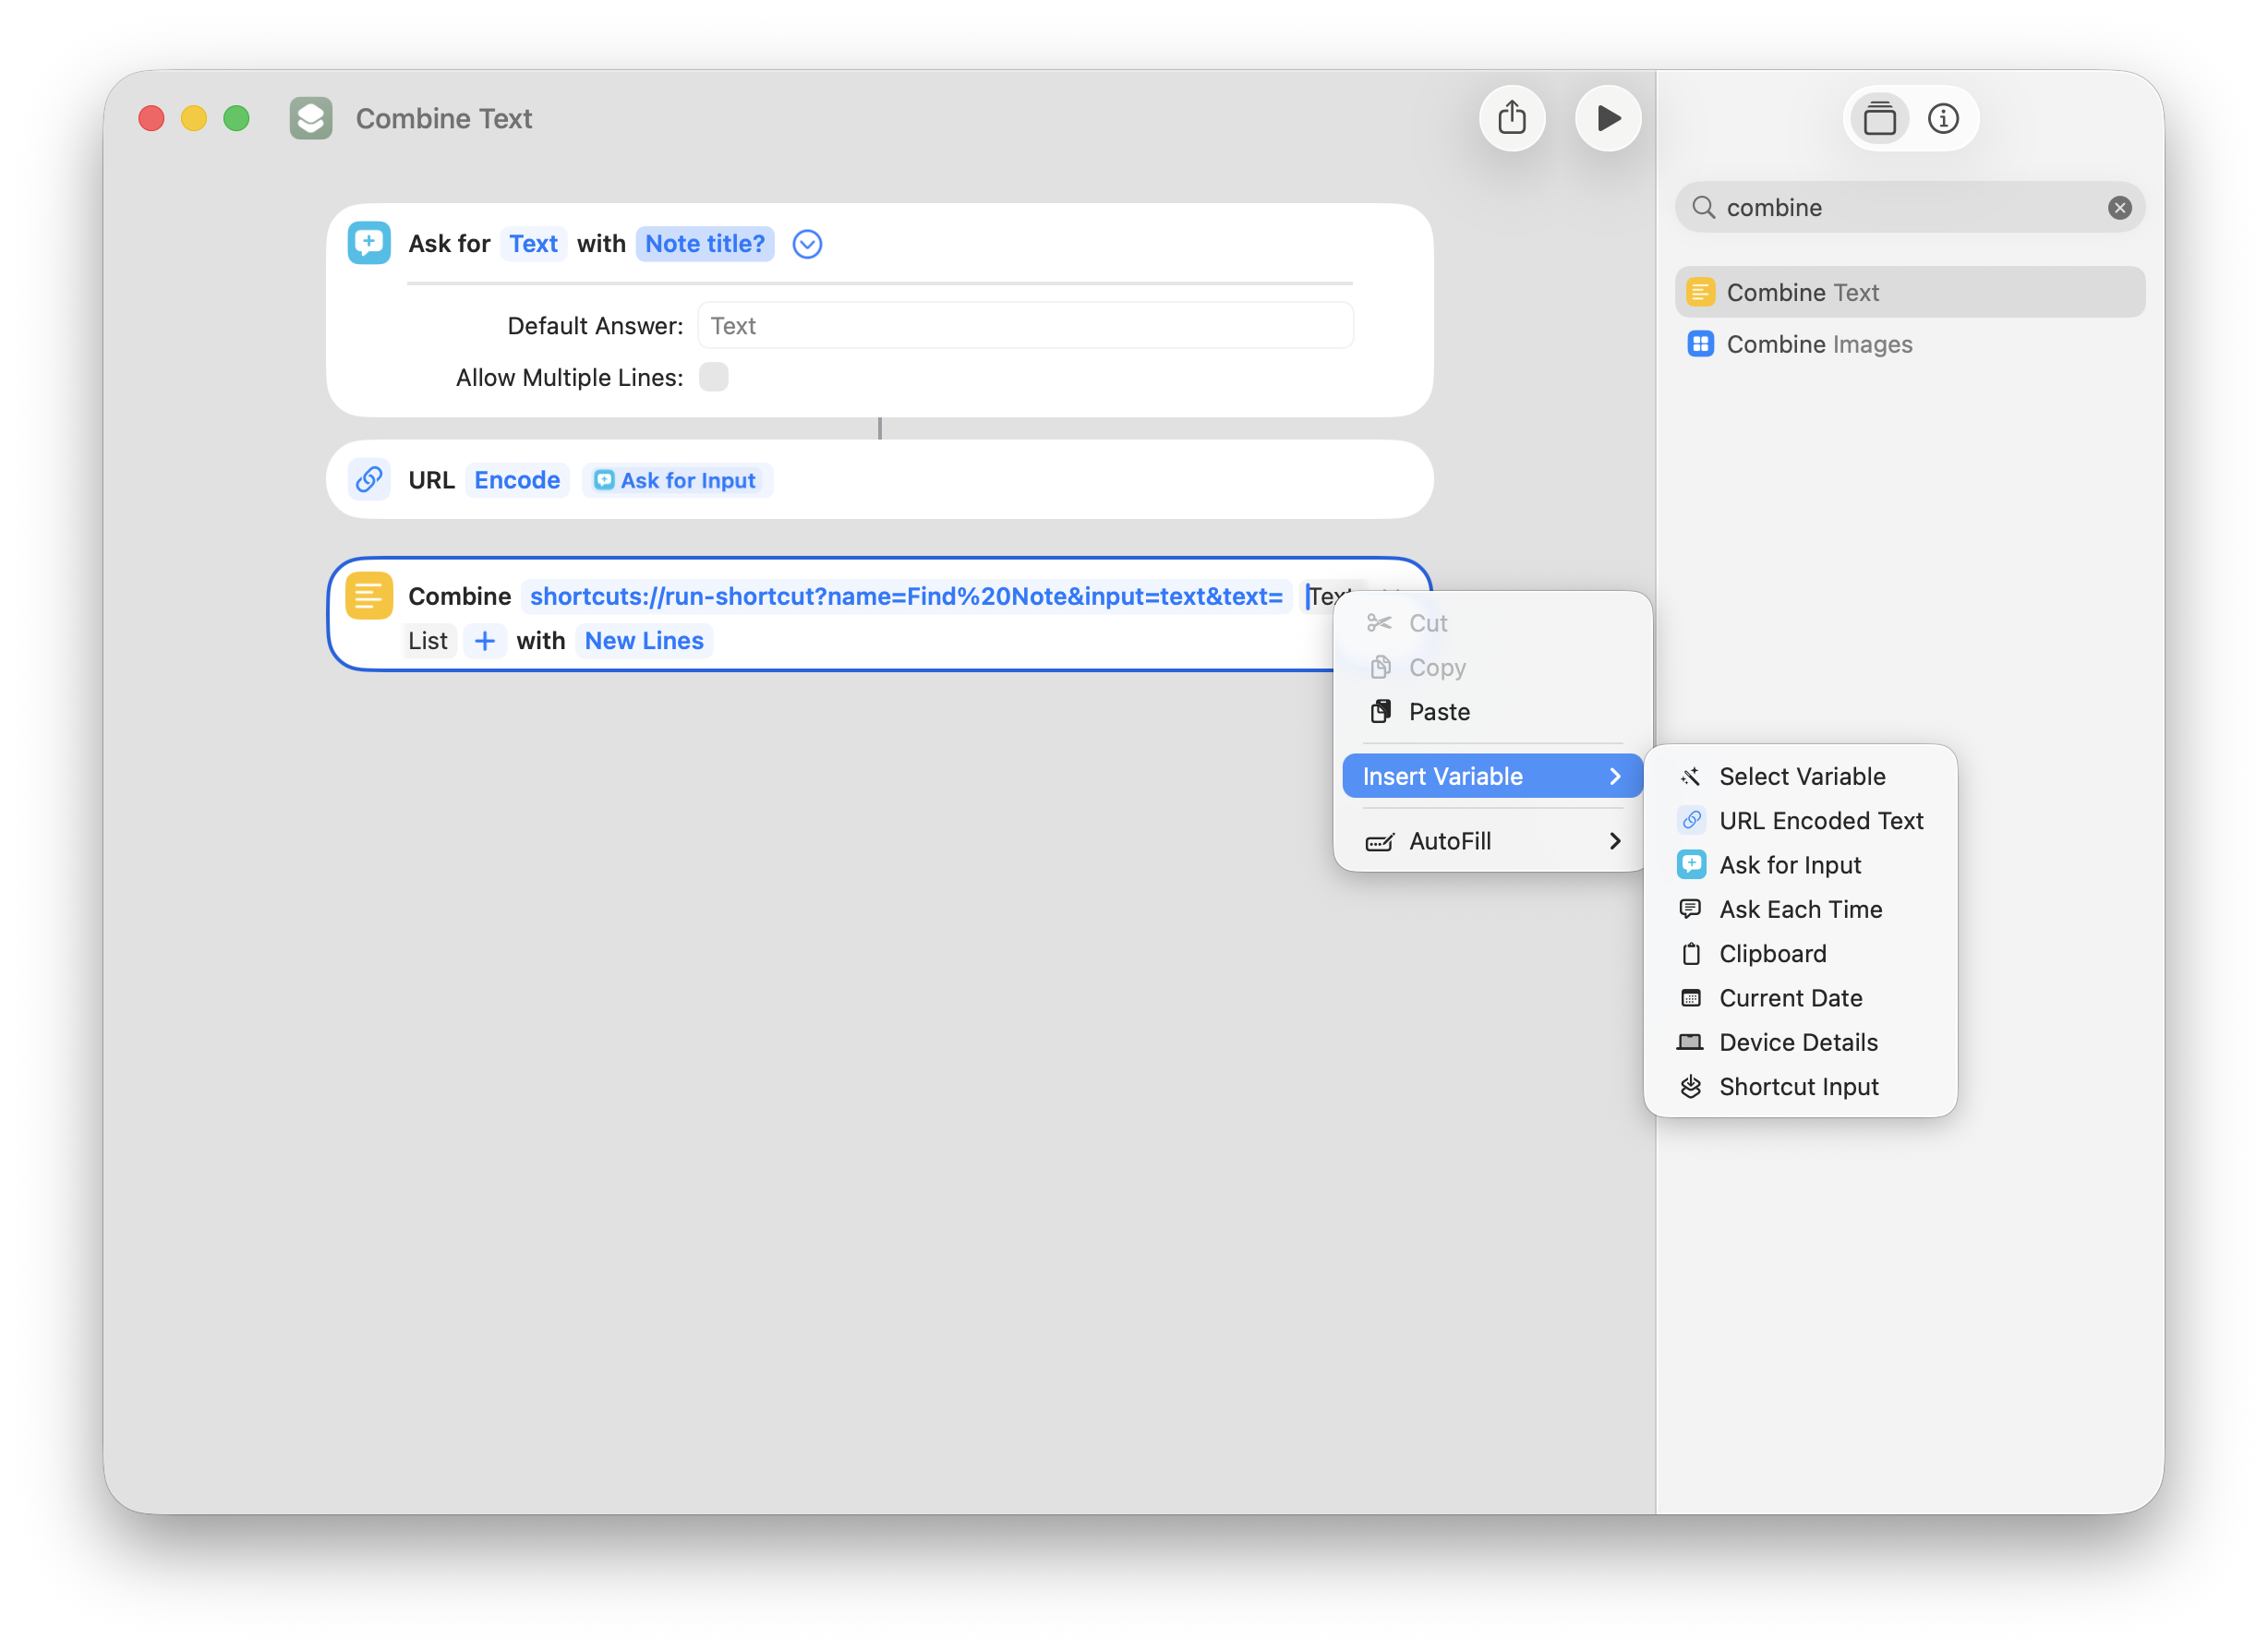
Add a Combine Text action. Clear the existing text field and type the base URL:
shortcuts://run-shortcut?name=Find%20Note&input=text&text=Then click the + button, select Insert Variable, and choose URL Encoded Text.
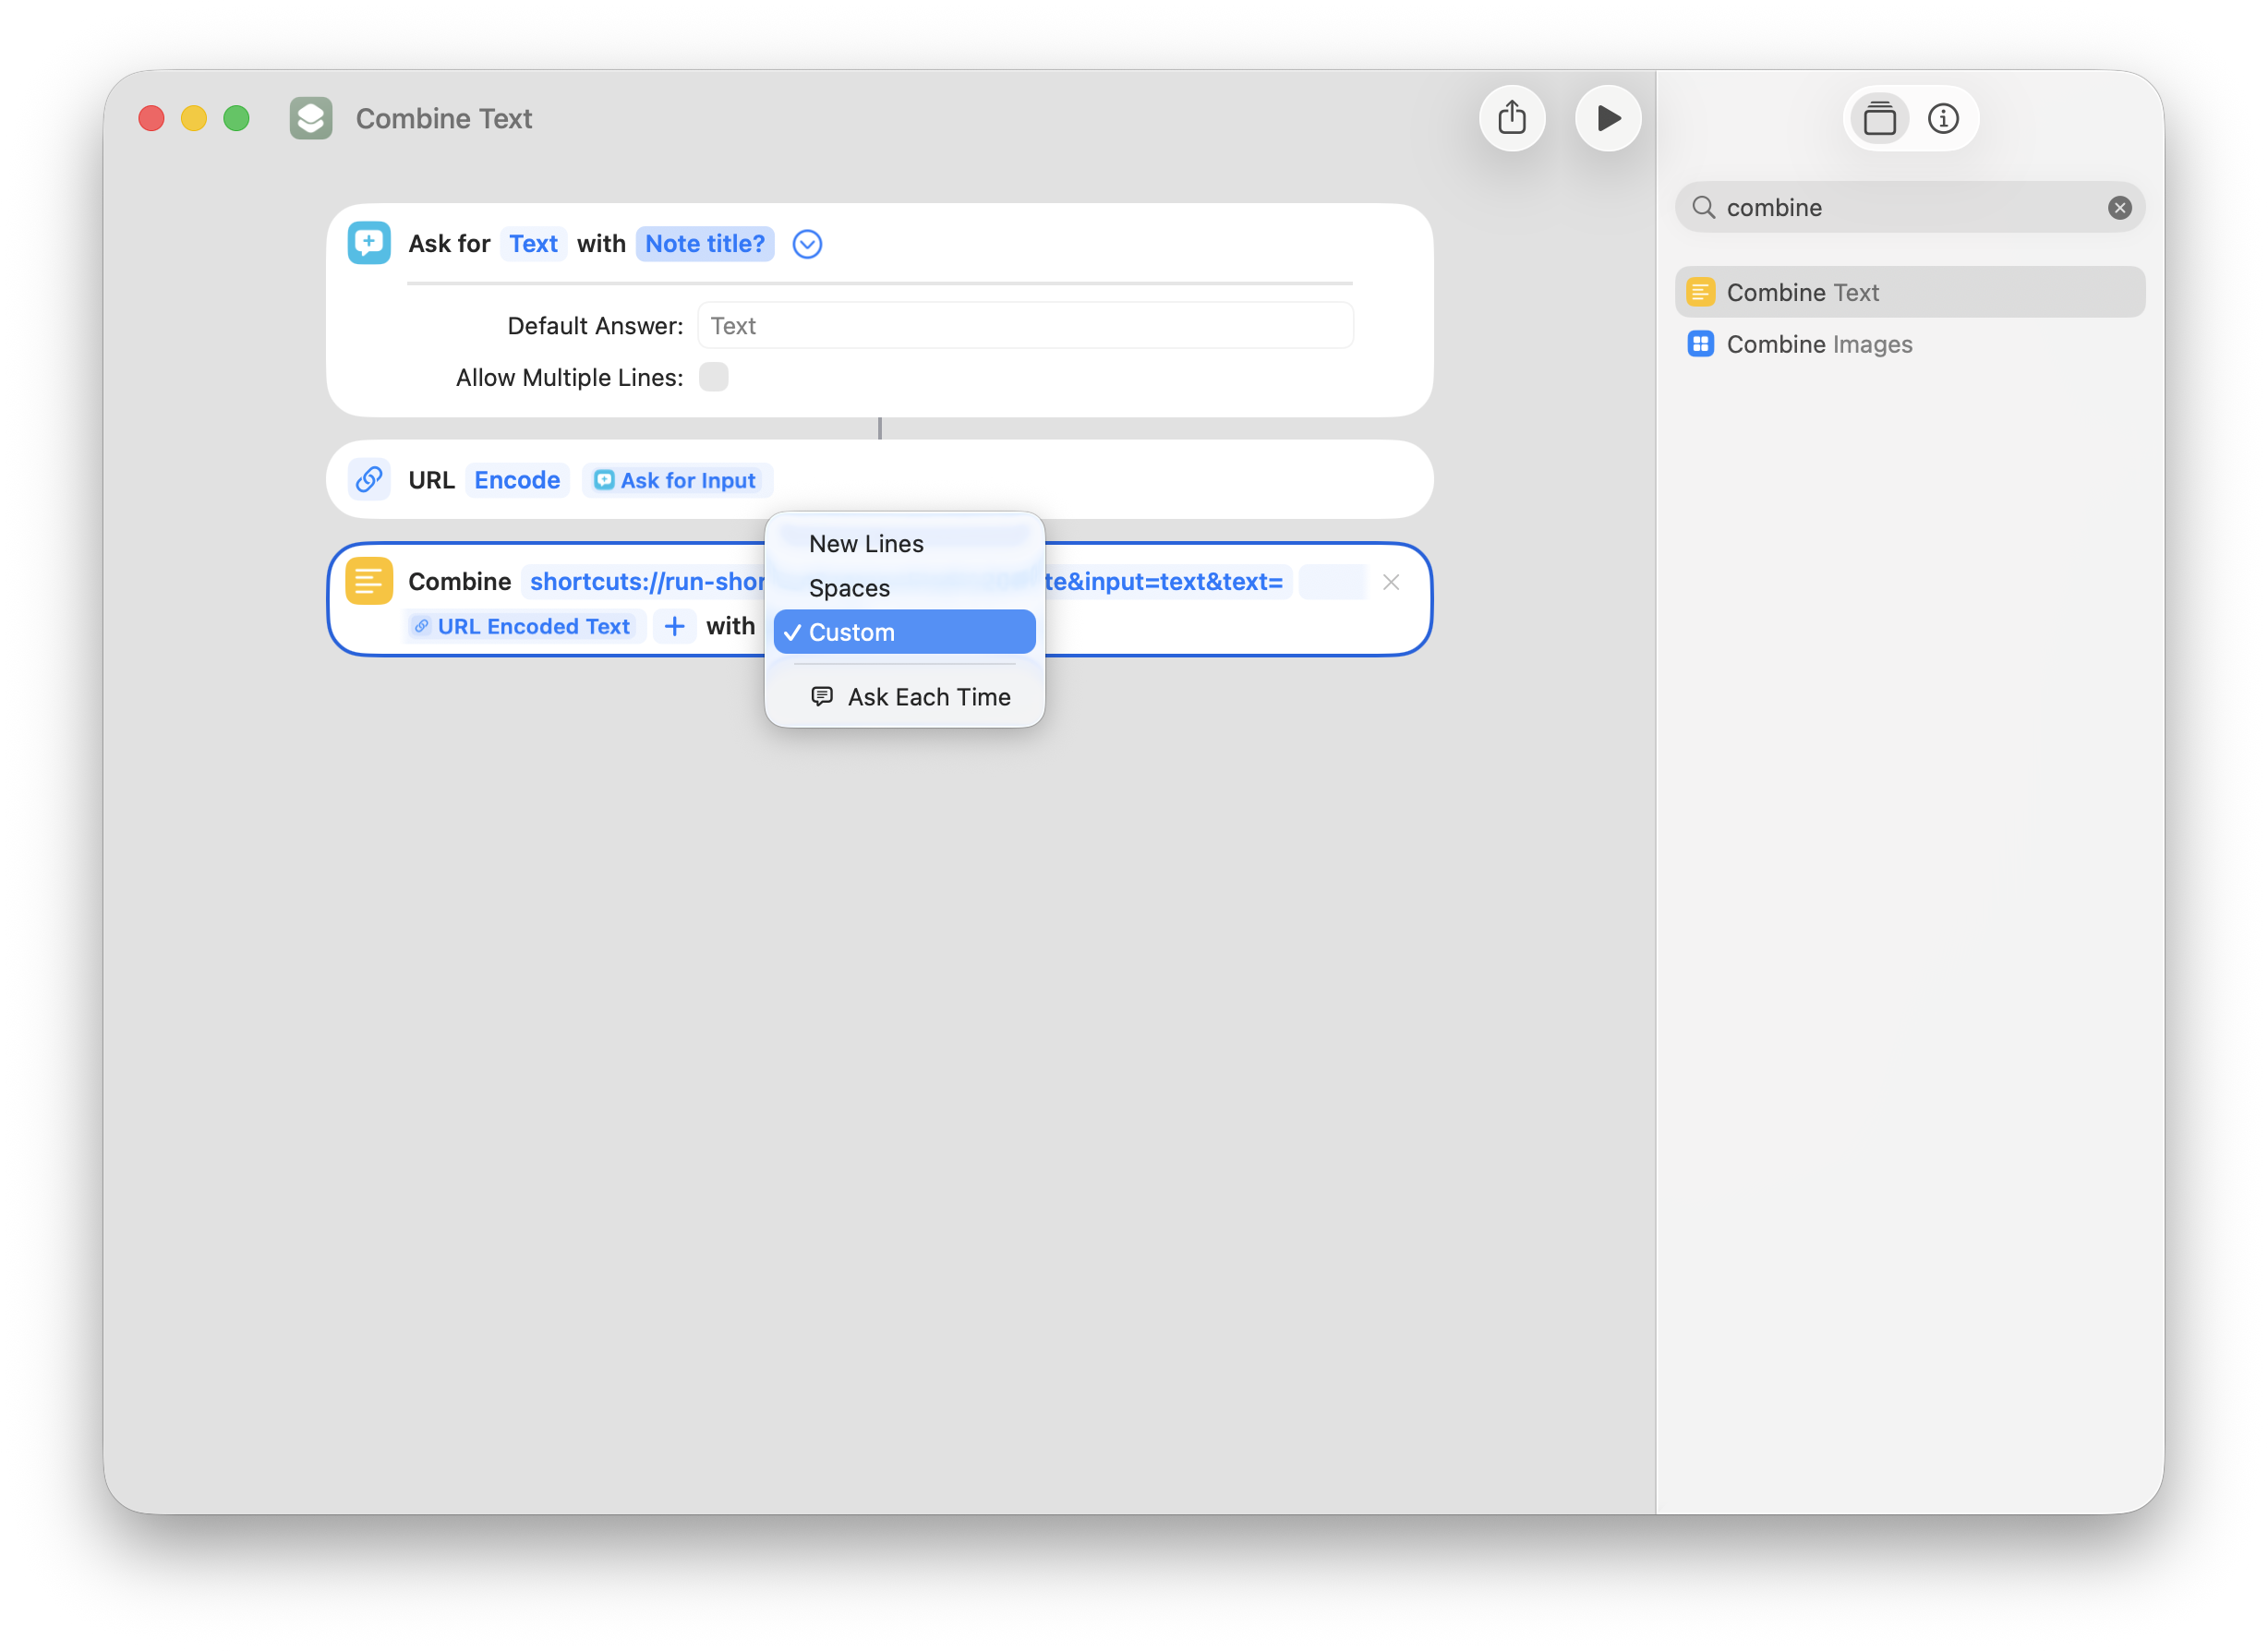
Click New Lines and select Custom.
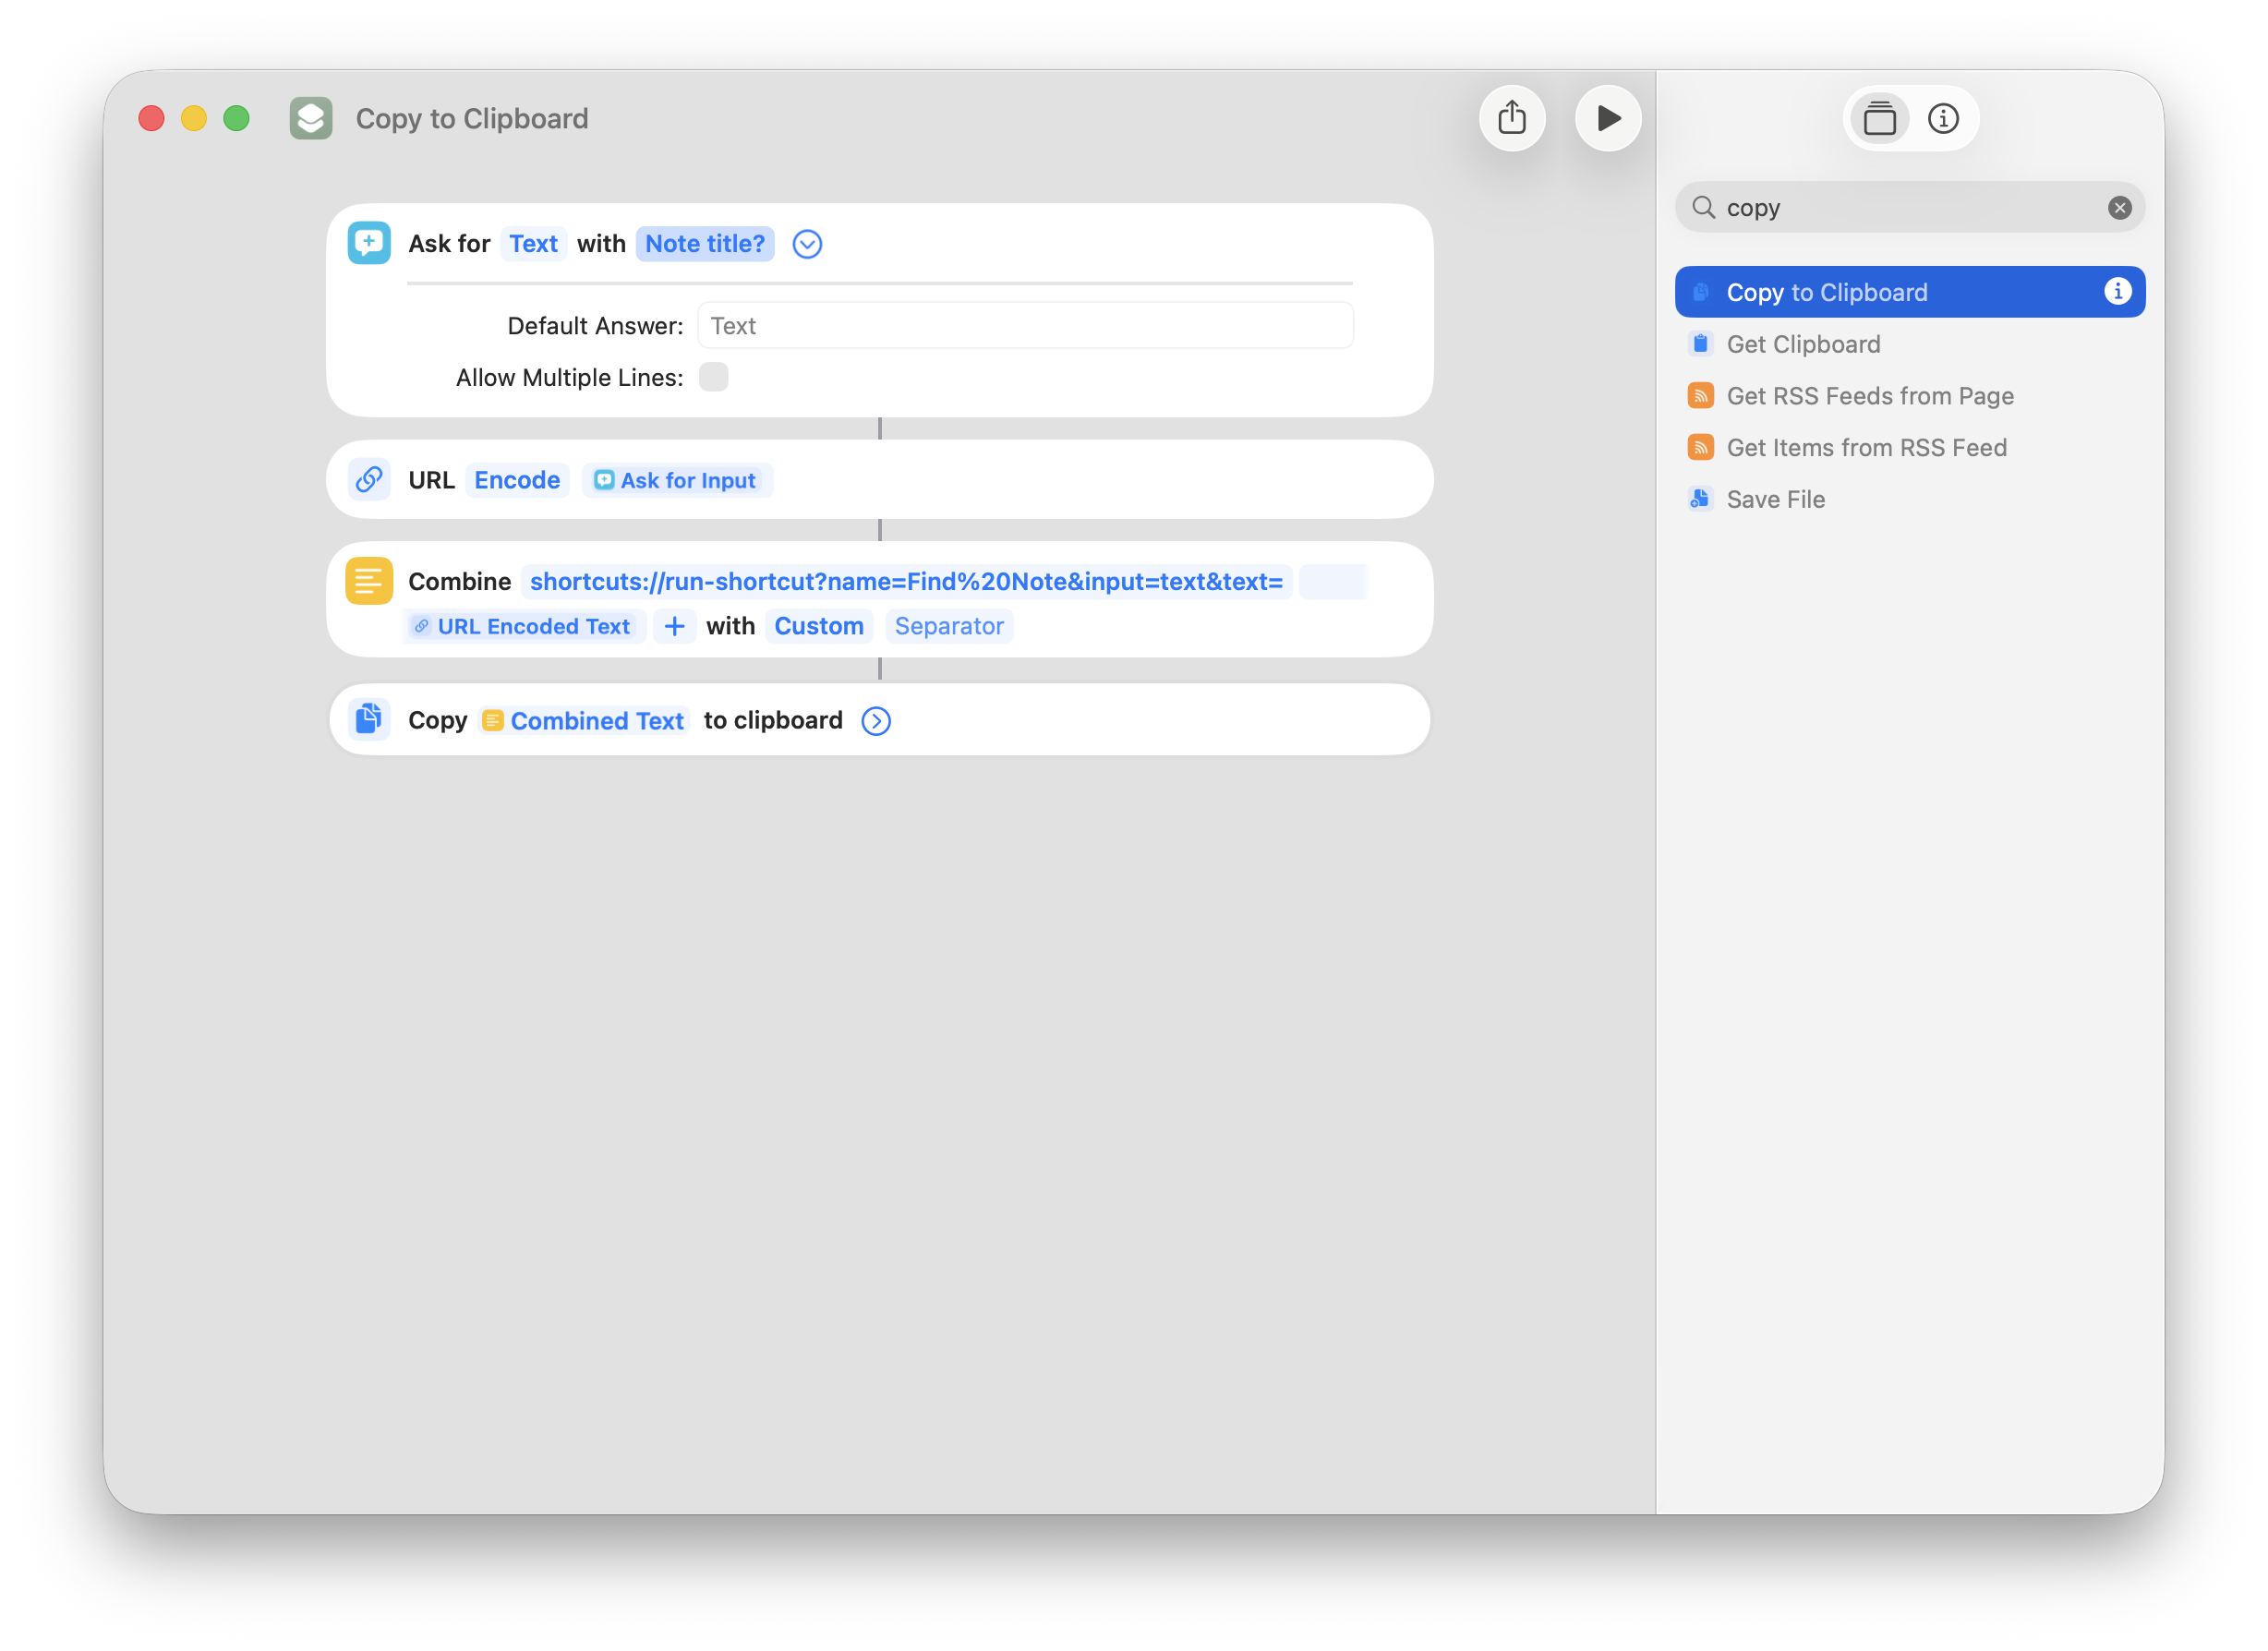
Step 5: Add a Copy to Clipboard action
Add a Copy to Clipboard action. The combined URL will be copied to the clipboard when the shortcut runs.
Step 6: Name the shortcut
Click the grey title text in the upper-left corner where it says “Copy to Clipboard” and rename it to Make NoteCove Link.
Step 7: Add it to the Services Menu
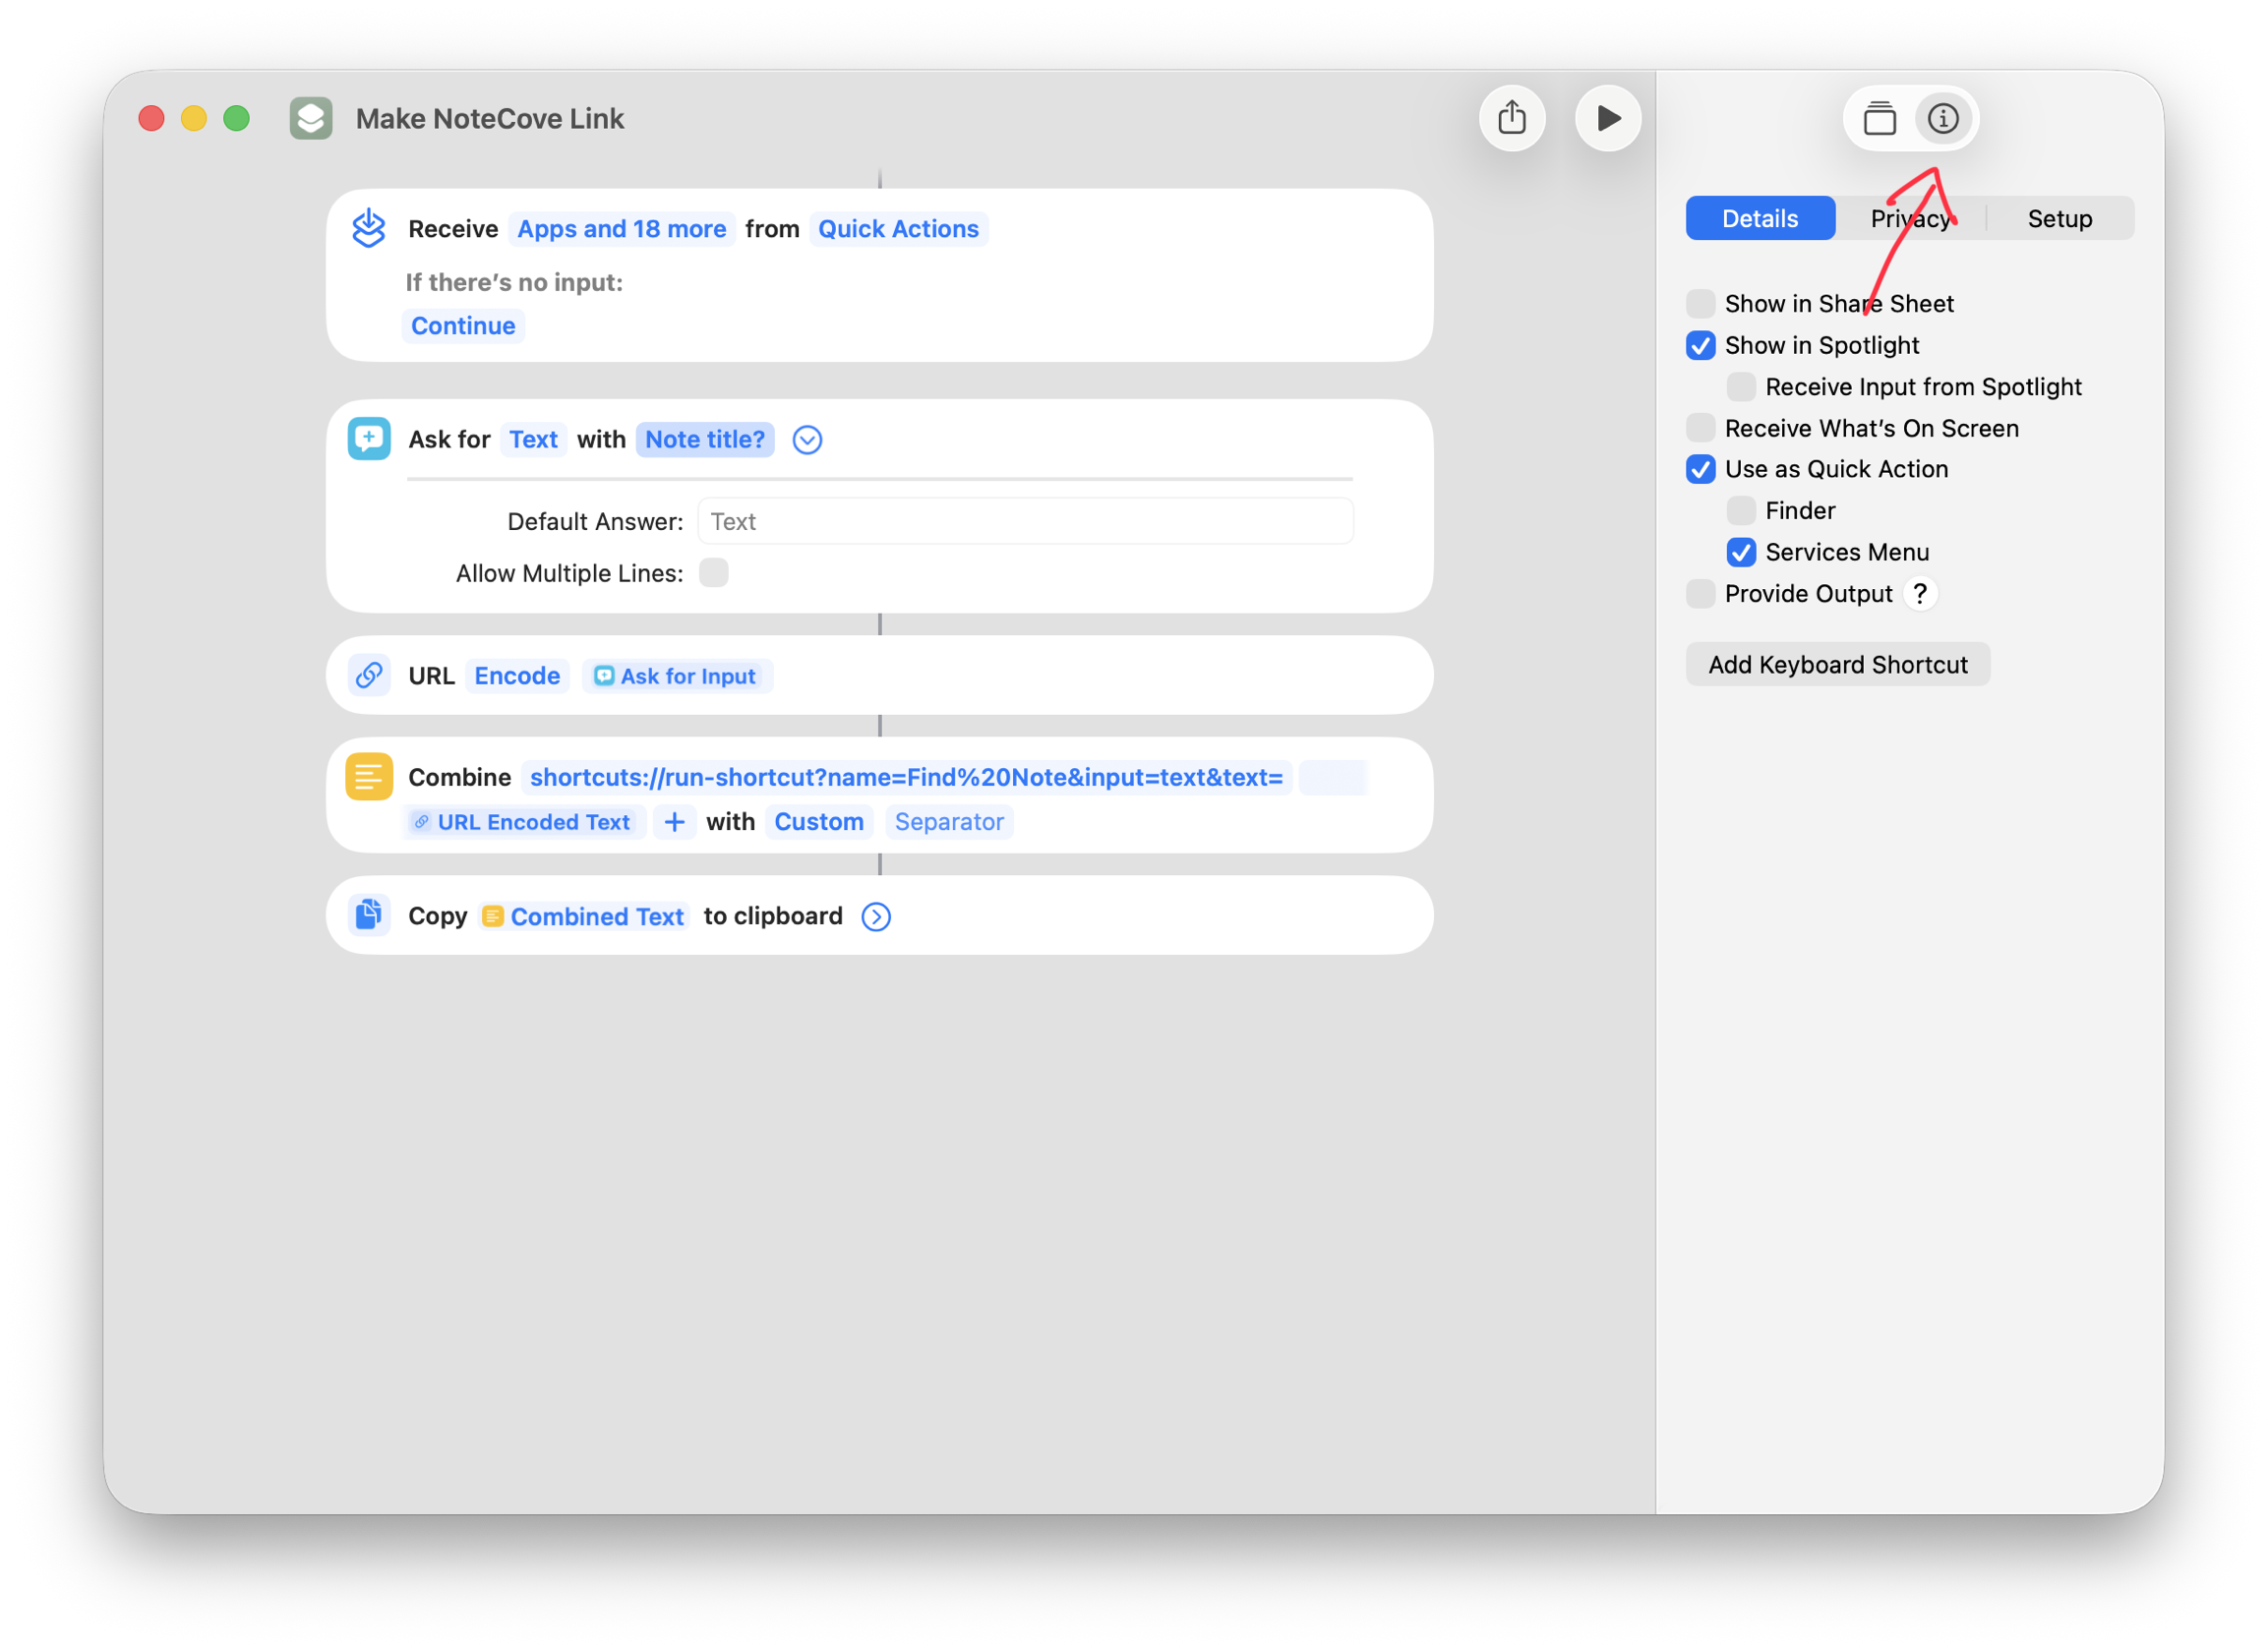
Click the circled i icon in the upper-right corner and enable the Services Menu option. This makes the shortcut available in the app menu of any macOS application.
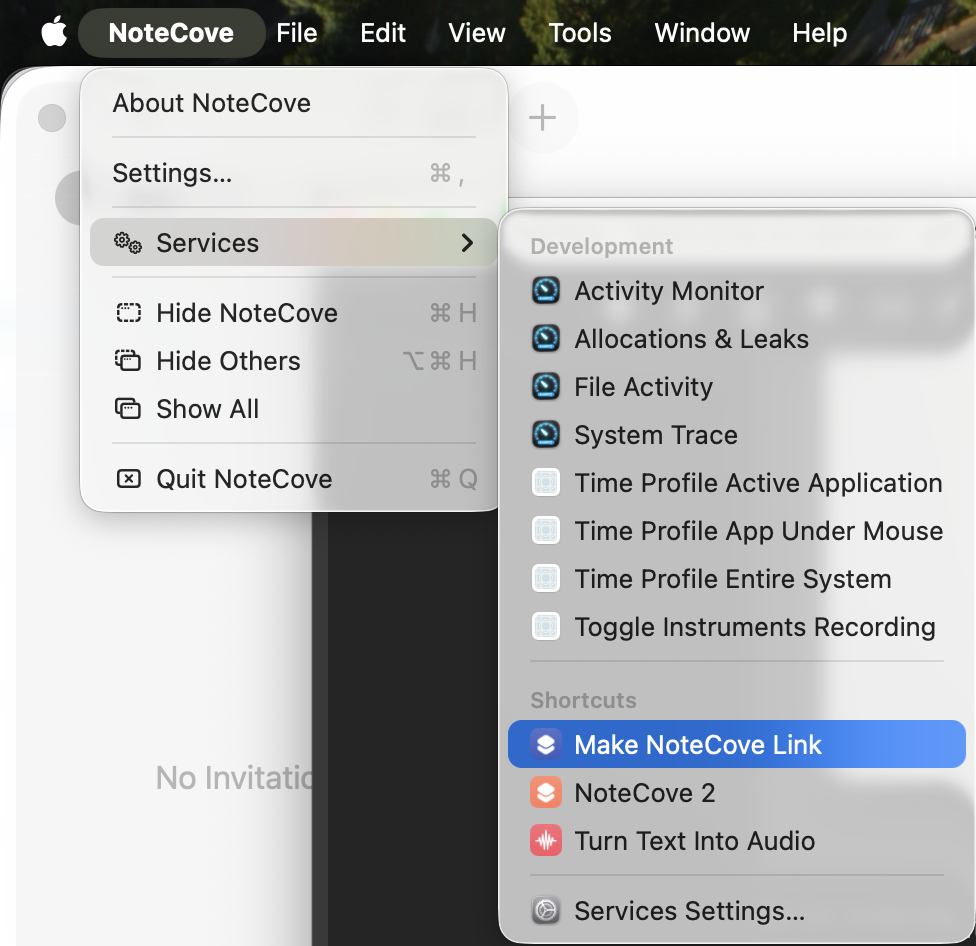
To use it, open any app’s menu bar, go to Services, and you should see Make NoteCove Link.
Part 2: Create the “Find Note” shortcut
This shortcut is the receiver — it opens the note whose title you encoded in the link.
Step 1: Create a new shortcut
Go back to the main Shortcuts screen and click + to create another shortcut.
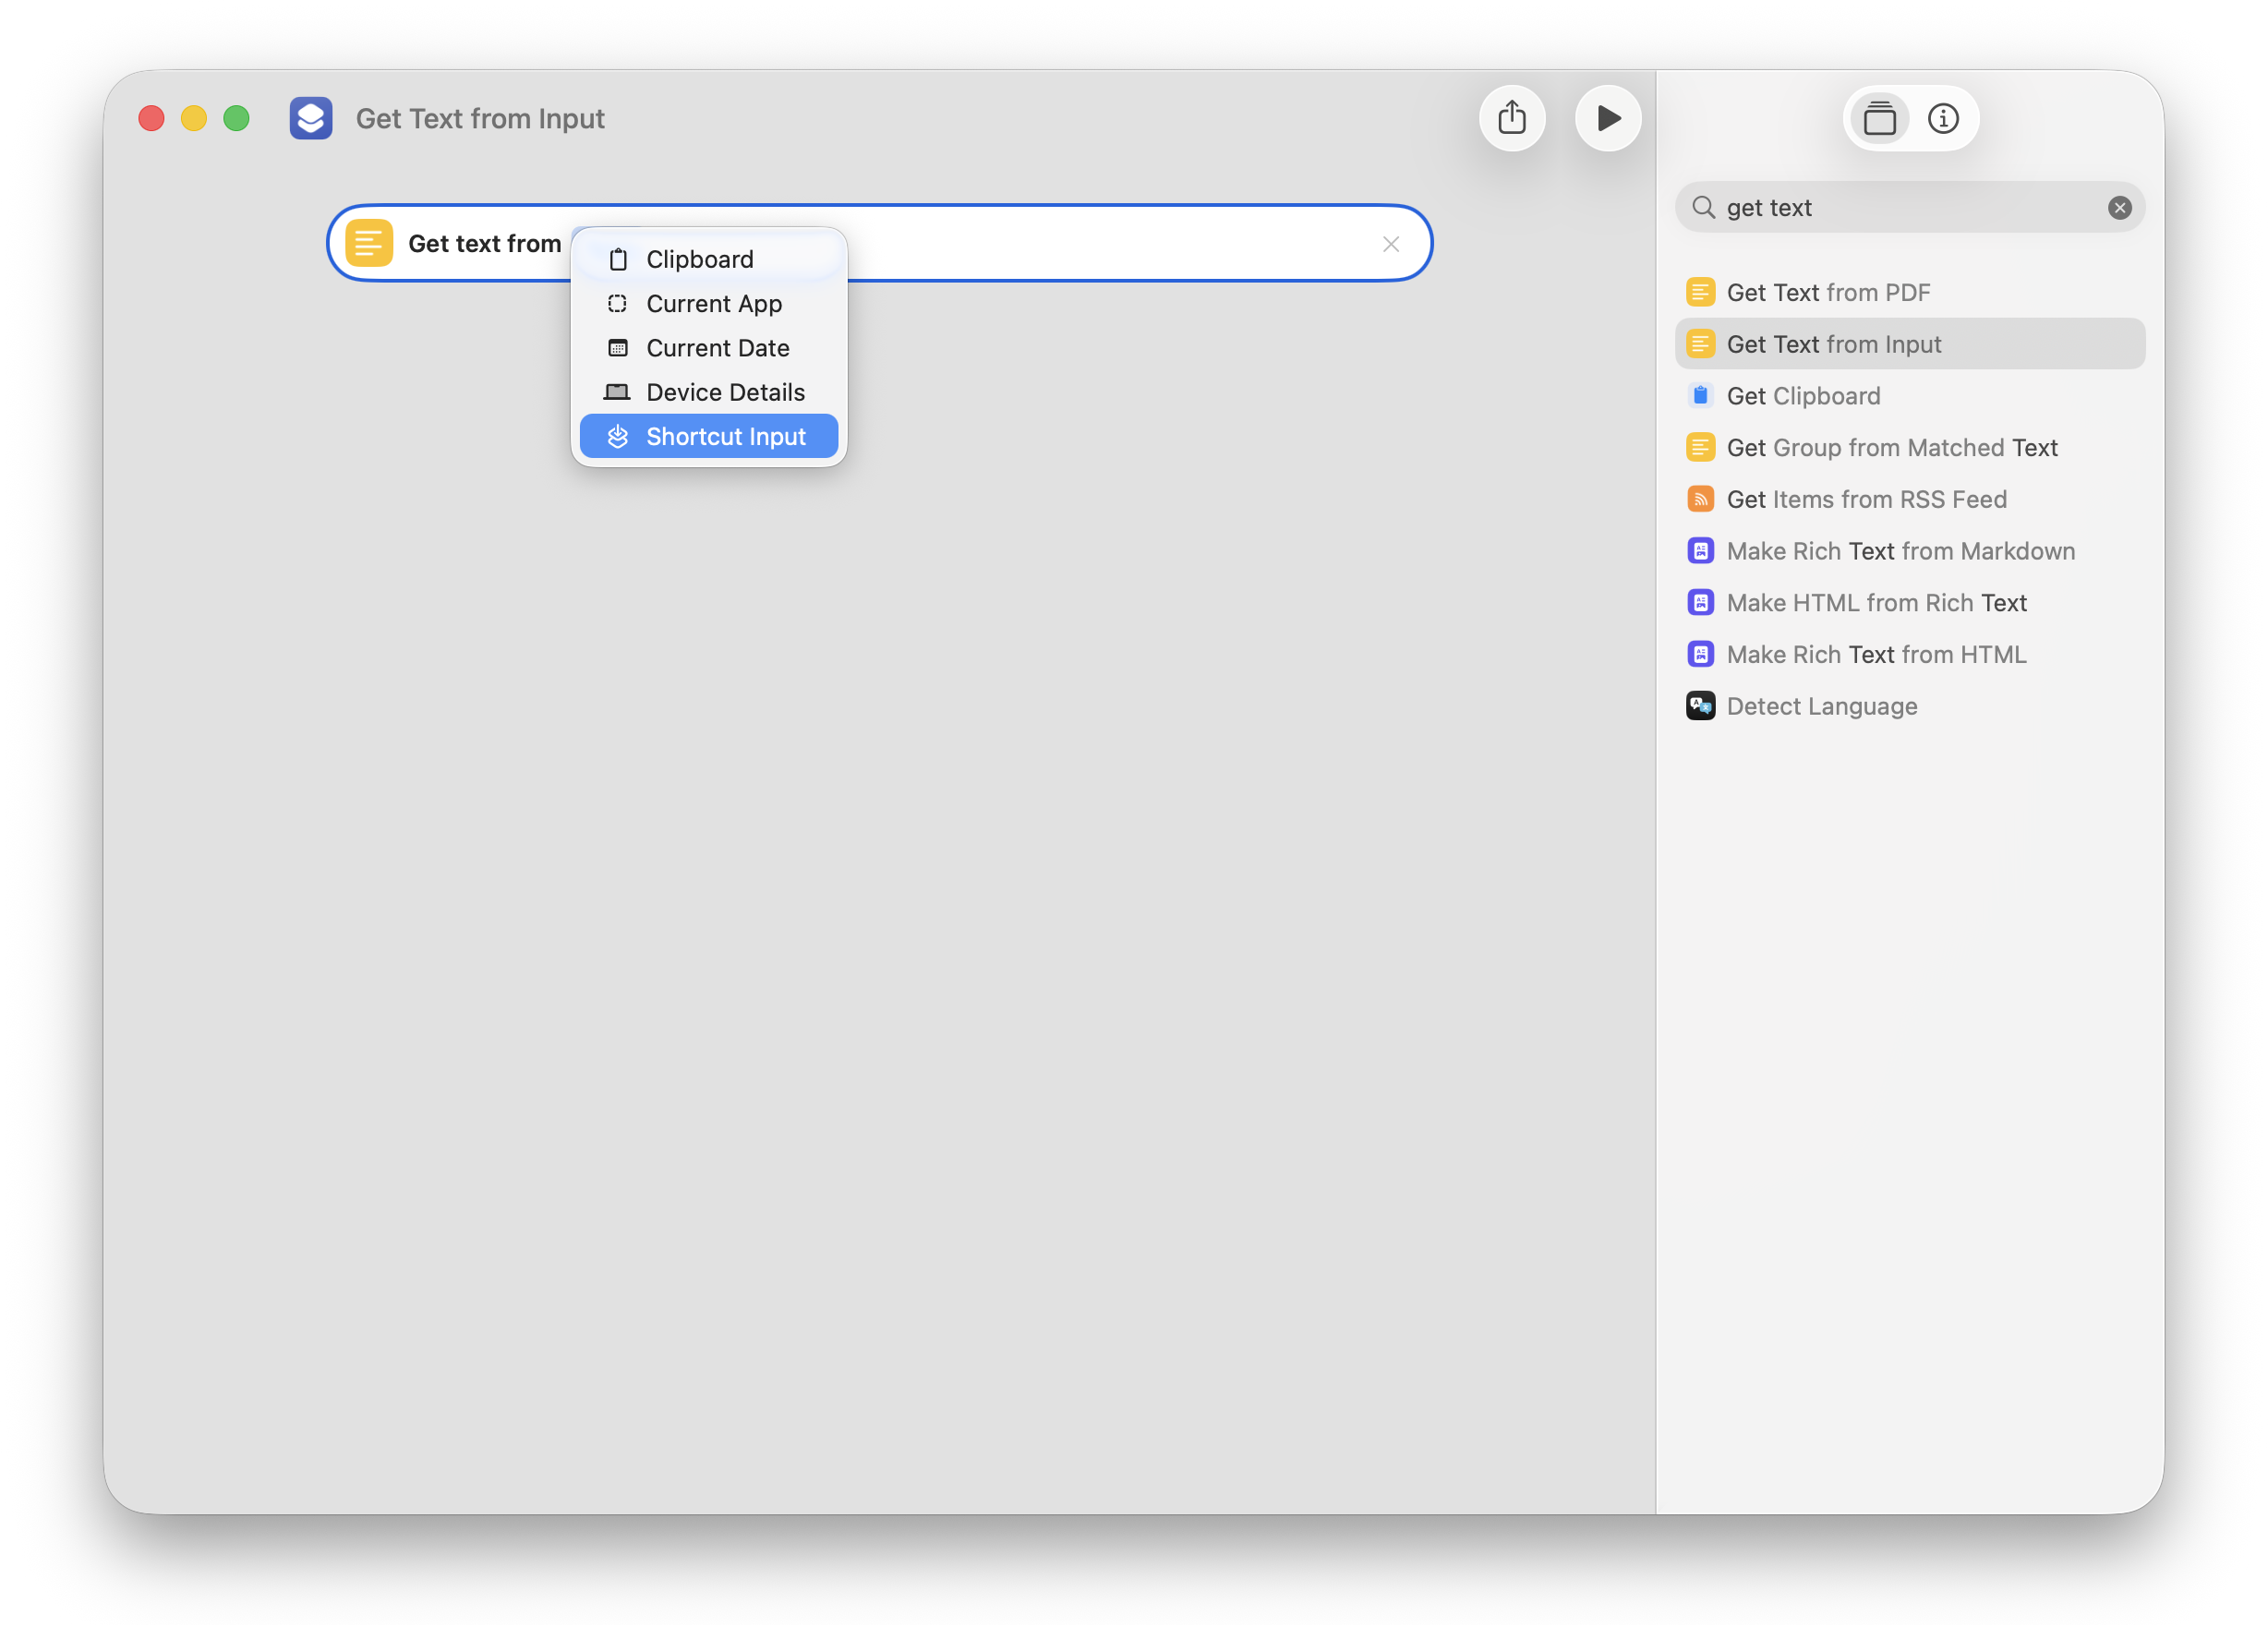
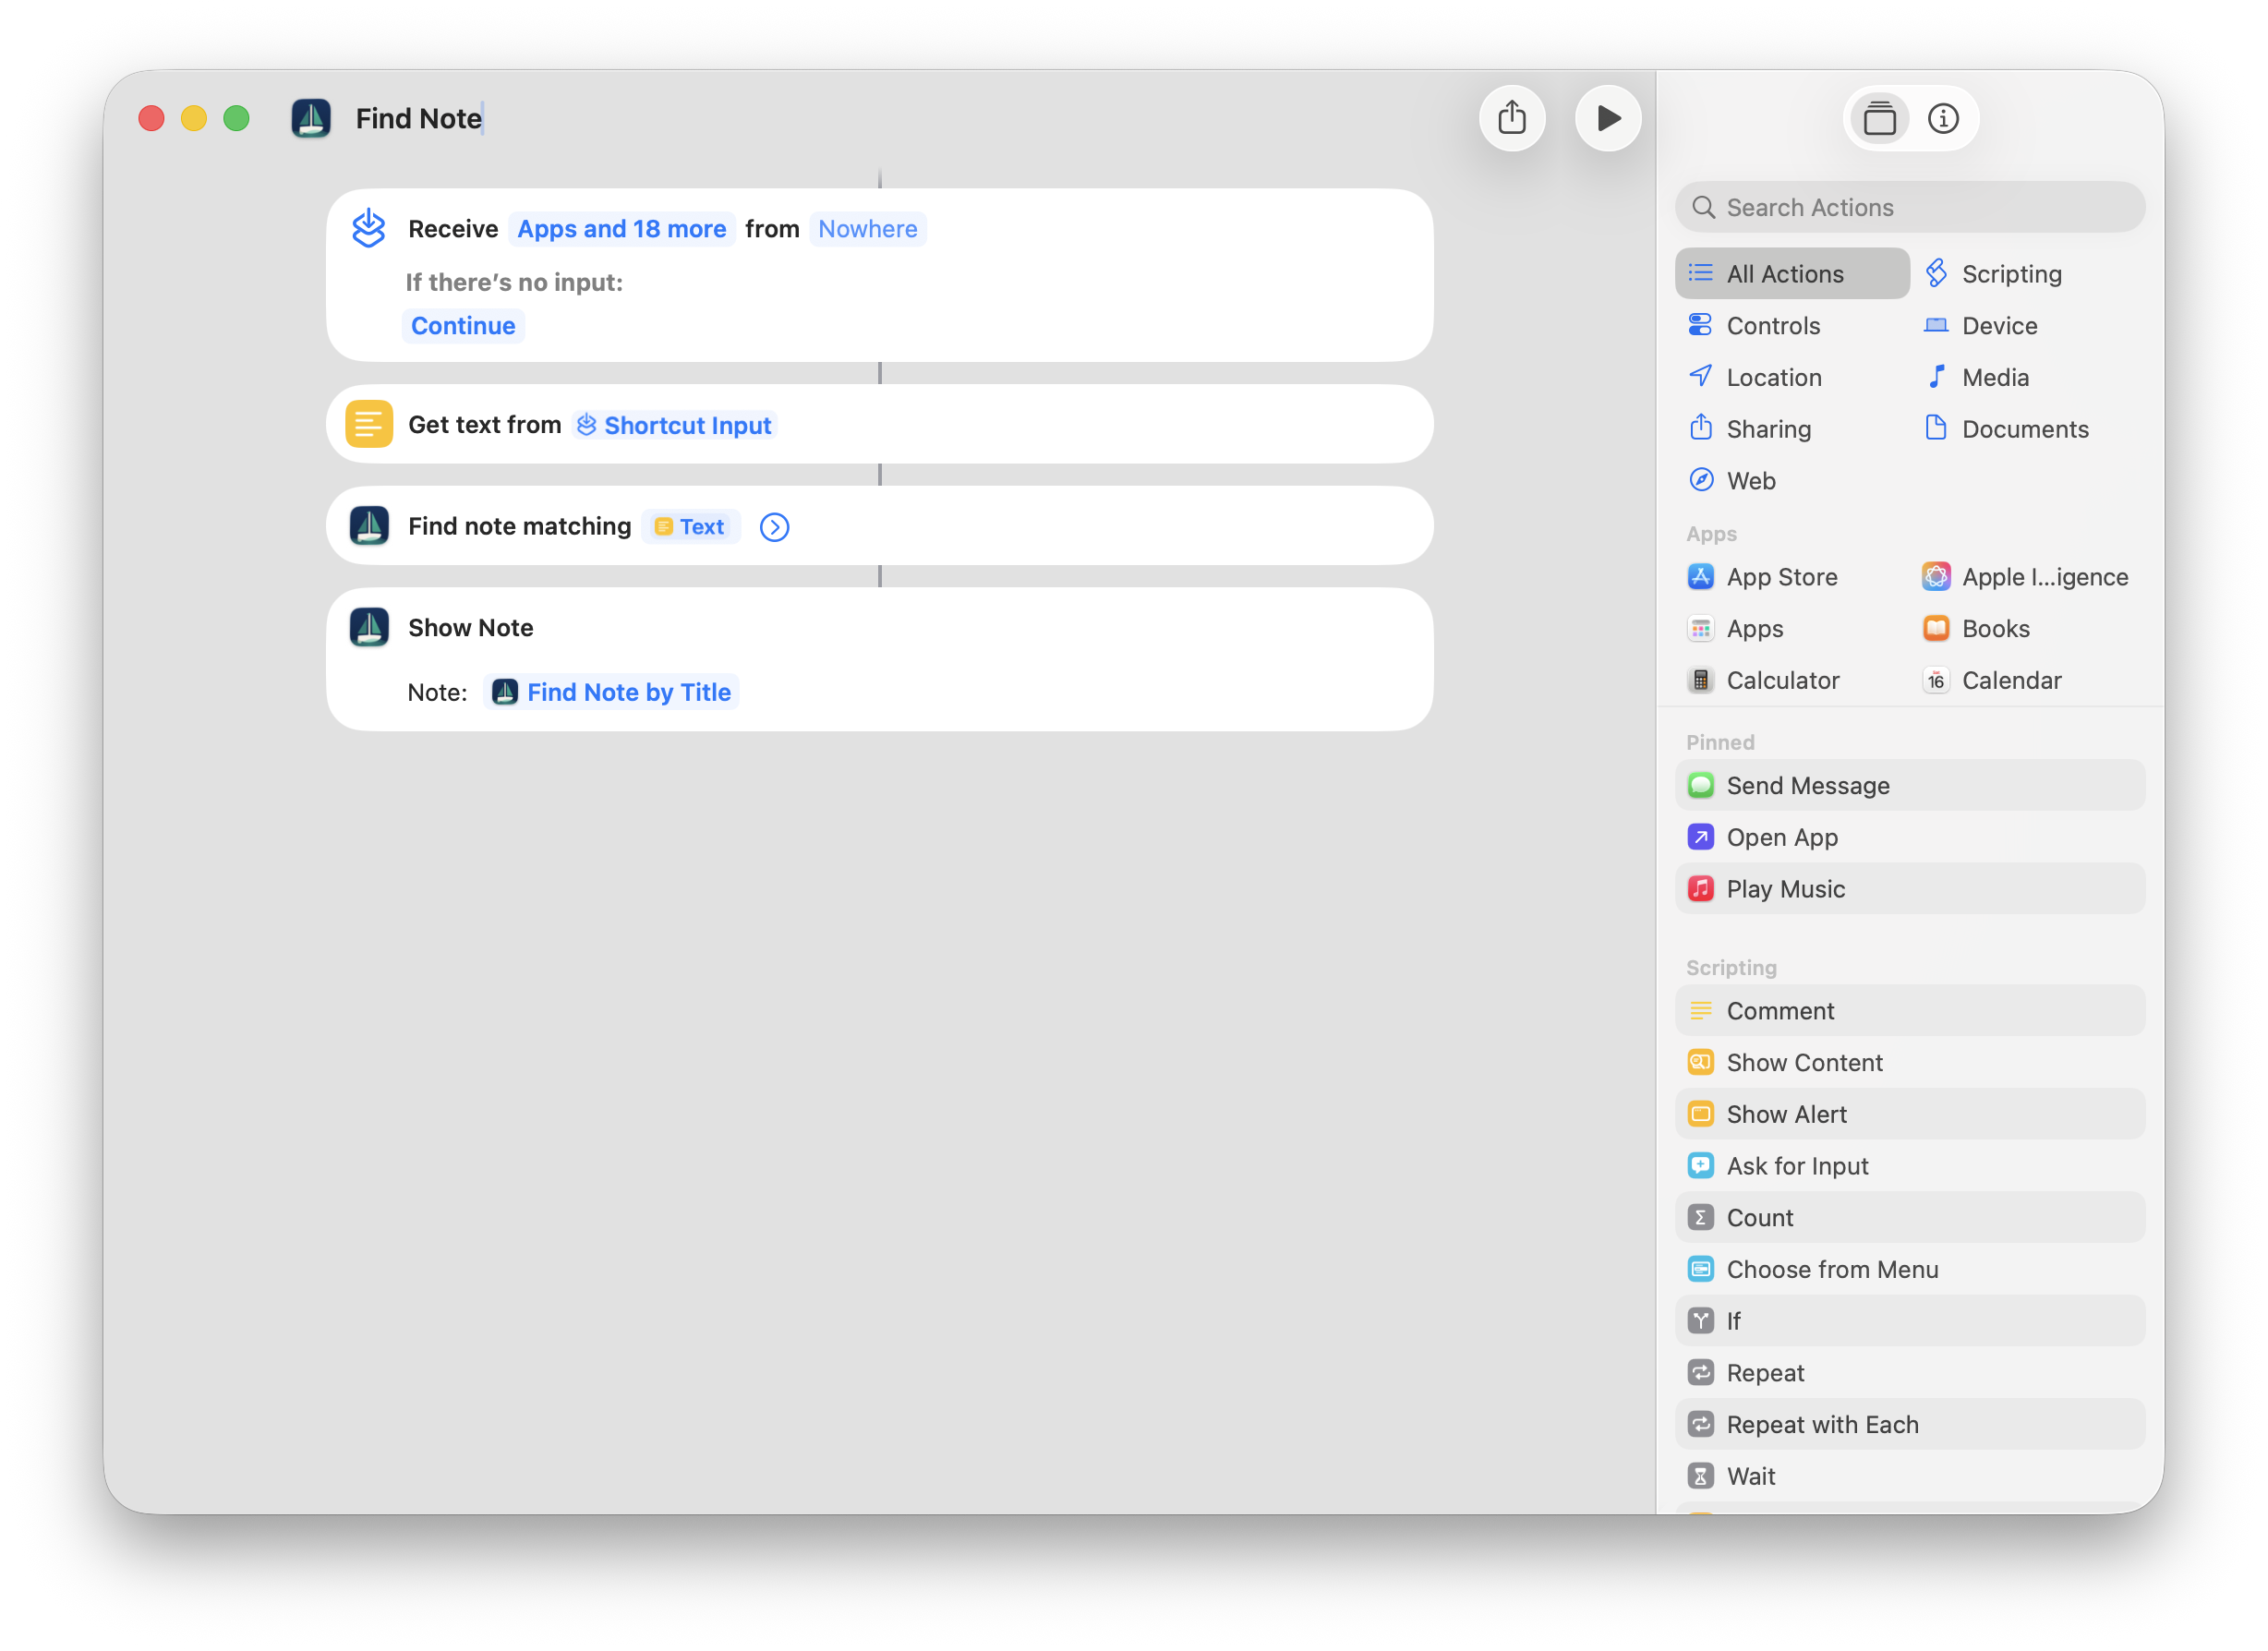
Step 2: Add a “Get Text from Shortcut Input” action
Add a Get Text action and set its source to Shortcut Input. This receives the text passed in via the URL.
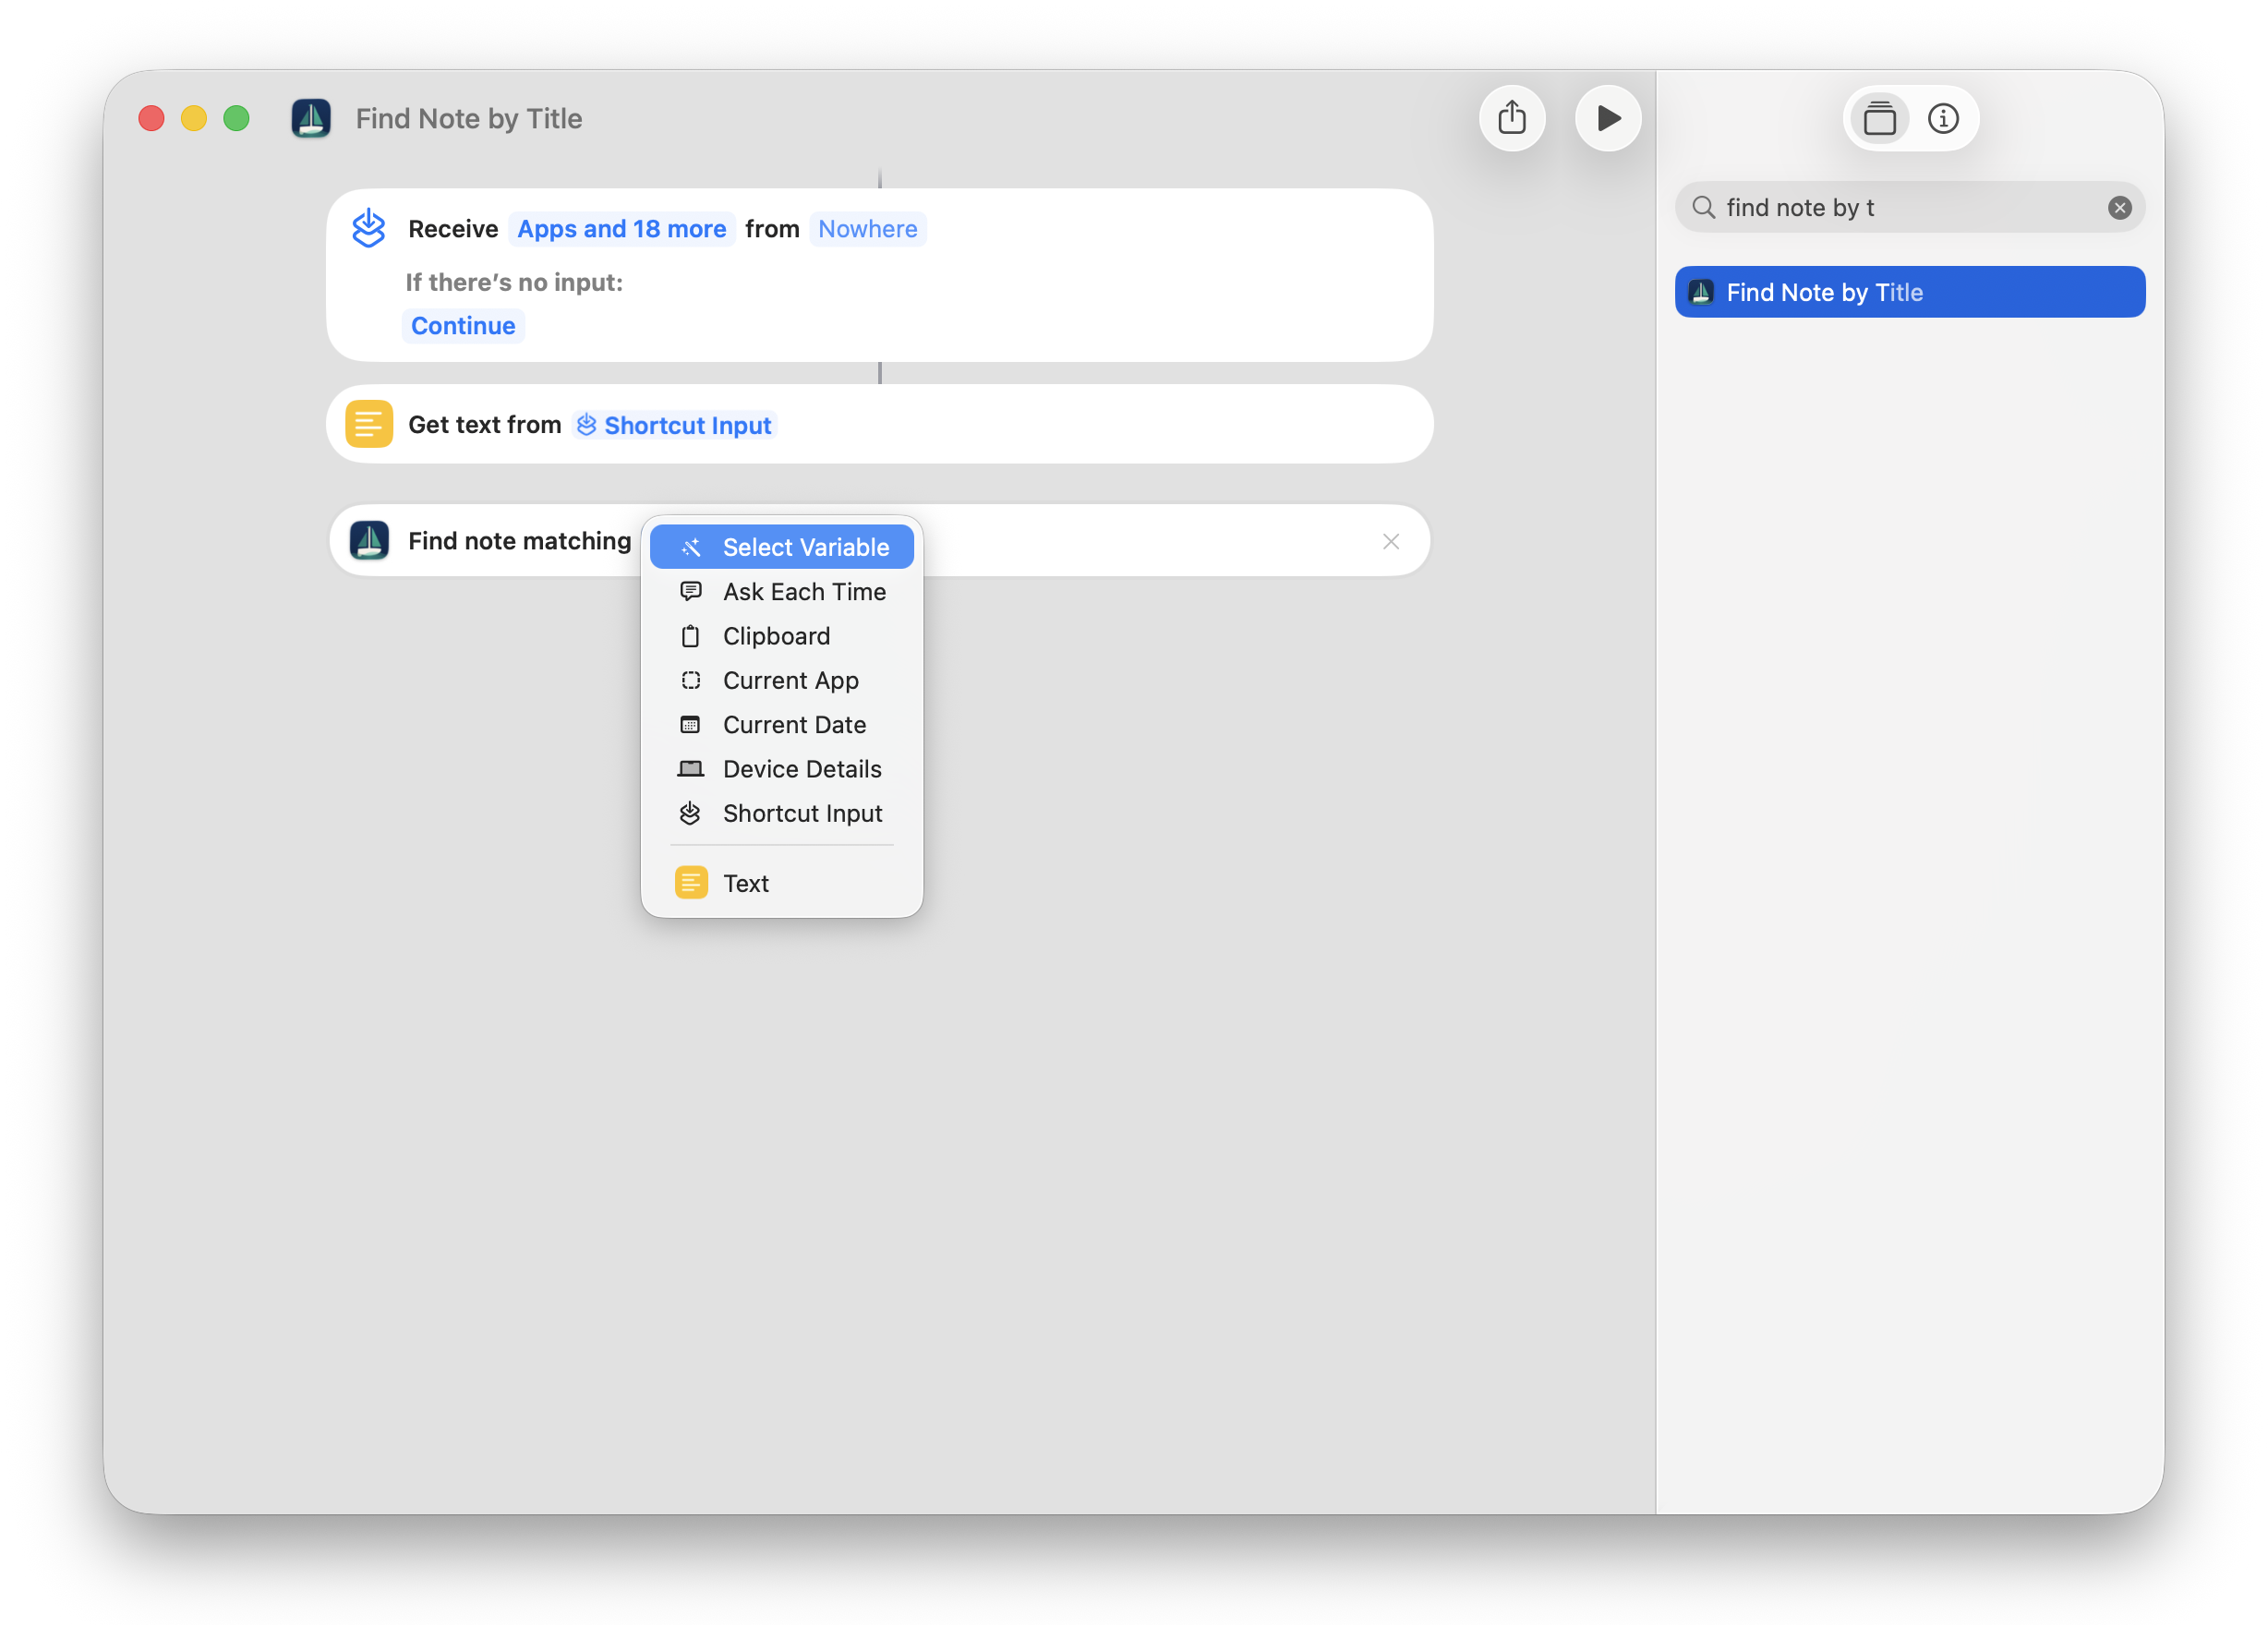
Step 3: Add a “Find Note by Title” action
Add a Find Note by Title action. Right-click on the Title field and select Text to use the text from the previous step as the title to look up.
Step 4: Add a “Show Note” action and name the shortcut
Add a Show Note action. Then click the title at the top of the editor and rename the shortcut to Find Note.
Tying it all together
- In any app, go to App Menu → Services → Make NoteCove Link
- Type the title of a note you have in NoteCove
- The link is now in your clipboard — paste it anywhere: a Calendar event, a Mail message, a browser bookmark
When you open the link, macOS will ask if you want to allow it (first time only). Say yes. NoteCove opens the note whose title you typed.
You can now link directly to your notes from Calendar appointments, email threads, or any other place on your Mac that accepts links.
Next steps
- Apple Shortcuts & Siri — full reference for all 28 NoteCove Shortcuts actions
- Agent Workflows — let an AI agent read and manage your notes automatically